Adieu, Pâte À Choux!

I know I'm slacking a little bit with the Saturday thing for the past two weeks, but believe me, I'm trying my best! Sometimes the weekend is just a little busier than expected, but rest assured, I'm determined to be back on the Saturday schedule as of next week! 

This week in school was a lot of fun, and not only did we do our usual baking, but we got to make our first display piece! That was pretty exciting and pretty cool, but I'll get to that in a little bit. 
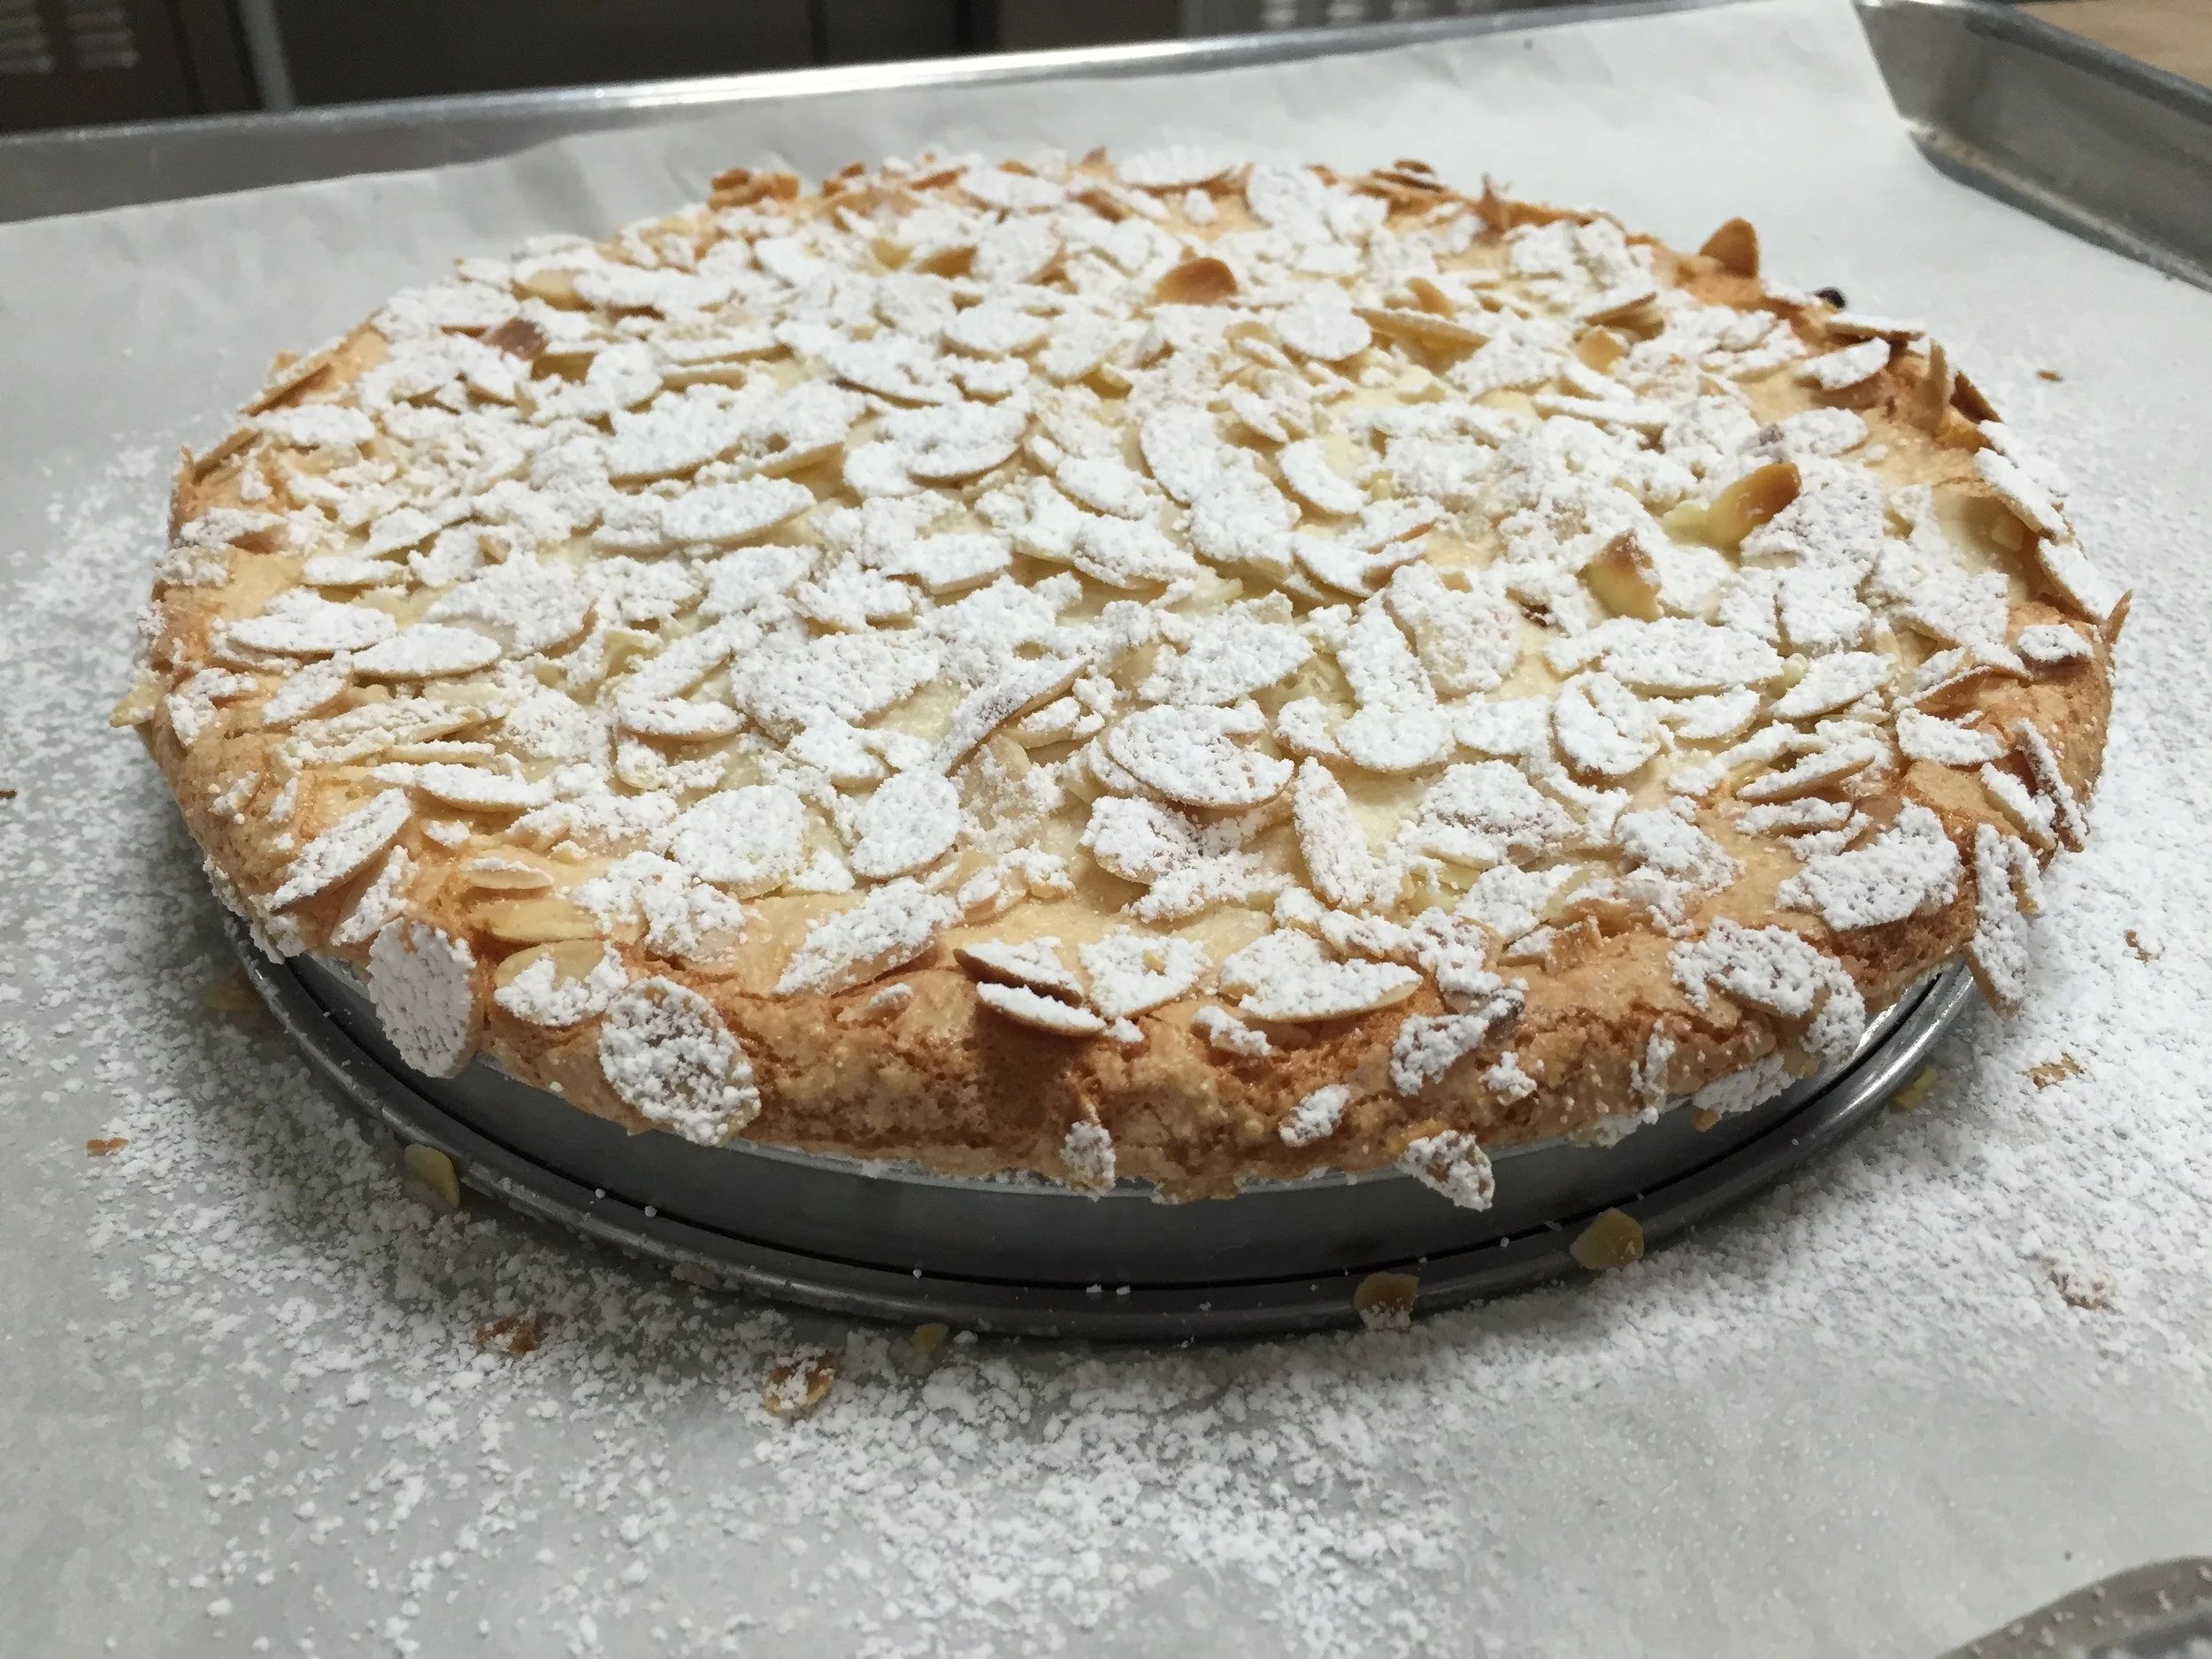
Brisee round

Brisee round

Starting out on Monday, we had two things on the agenda: the St. Honoré cake and one of my most favorite things, gougéres! We started with the cake, and we rolled out and docked the dough for our base. Feels like it's been quite some time since we made a tart dough, even though its really only been a week. After that was finished and chilling in the fridge, we made a batch of pâte à choux, and split it in two. Some of it would go toward the completion of the St. Honoré cake, and the rest would be going toward the gougéres.

GOUGÉRES 😍 

GOUGÉRES 😍 

We took care of the gougéres first, and oh my gosh, they're so good. They're just little cheese puffs, but I cannot get over how tasty they are. I like to refer to them as the fanciest cheese its that you'll ever have. They're just cheesy and spicy and oh so yummy! We mixed gruyere and parmesan with cayenne pepper, paprika, and a little black pepper, then mixed that all into the actual pâte à choux. Then we piped it, and sprinkled more cheese on top, and baked them.

A little time lapse of making caramel

A little time lapse of making caramel

Caramel topped puffs

Caramel topped puffs

While those were in the oven, we finished piping everything that we needed for the St. Honoré cake, which included some more plain puffs, and then some rings of choux around that piece of dough we rolled out earlier. While those guys were all in the oven, we made a batch of caramel that we'd be dipping those plain puffs in to adhere them to the base of the cake. After everything was baked, all we really had left to do on Monday night was assemble the cake, since the cheese puffs are sort of a one and done thing. The filling for the cake is pastry cream mixed with a meringue, which makes it nice and light. There's even a special piping tip (the St. Honoré tip) that we used to pipe it on top. 

St. Honoré cake

St. Honoré cake

Preparing my toppings

Preparing my toppings

On Wednesday, we spent the whole night working on one thing, our croquembouche! A croquembouche is a very traditional Italian wedding cake, but we were making little ones in class, since we didn't have the capacity to make something so ginormous. We started the night off again making pâte à choux, and piping what felt like a million puffs. In reality, I think that I only ended up with about 60, but still, that's a lot of puffs! While the puffs were baking, we made more caramel, which we would use for two things: one, to decorate our puffs, and two, to hold our croquembouche together.

Dipped puffs

Dipped puffs

Chef Jeanne told us that we should pick a theme of sorts, and being the basic gal that I am, of course I went with a fall vibe. With our leftover choux that we didn't pipe into puffs, we made little decorations. I made a pumpkin, the word fall, some little leaves, and tiny hearts. 

Piping practice

Piping practice

Side note, I'm also trying to learn calligraphy, so what better way to practice than with pâte à choux! Turns out, dough isn't as easy to write with as frosting or chocolate is. You can't say that I didn't try. 

But anyway! Onto decorating the puffs. After they were dipped in caramel, we dipped the puff into a variety of toppings while the caramel was still tacky. I used a combination of cocoa nibs, shredded coconut that's dyed orange, pearl sugar that's dyed red, and ground pistachios. After they were all dipped, decorated, and dried, it was time for assembly! One by one, we dipped the puffs in more caramel, and stacked them all on top of each other until it came to a point. The last thing we had to do was just plop our little decorations on, and ta da! A lil' baby croquembouche!

My fall croquembouche!

My fall croquembouche!

Going into Friday it was a pretty big day. I don't really have any pictures because we had a written test and then our practical exam for pâte à choux. This written test was a little bit different than our last two, because rather than just being tested for the end of the unit, we've reached the end of the first level! Our tests are usually 15 minutes, and this one was an hour. It was a lot of information to remember, but I think on the whole, I did pretty well. I have pretty bad test-taking anxiety, so I was a little more stressed out than I'd like to admit. But, after that was all said and done it was into the kitchen and we got to baking. 

We had to present 3 things for our test: 3 chocolate eclairs, 3 coffee eclairs, and one Paris-Breast. All things that we made at the very beginning of the unit. We have to write up an itinerary for each test, so we have some kind of a plan to follow, and I followed mine almost to a tee. I was finished only 8 minutes after I had planned to be done, and that put me being finished just over 20 minutes before the grading deadline. Other than our half hour break for dinner in the middle, everything is sort of a blur during the actual test. Lots of running around, baking, taking things out, chilling stuff, whipping, etc. There's just so much going on at once. The itinerary definitely helps, because you have something else other than a plan in your head to check in with, something that you know you won't miss a step for. 

Final test presentation! 

Final test presentation! 

Once grading was over for me, I just sort of hung out and got everything cleaned up and ready to go. I was the first one to be graded, so I had a lot of extra time on my hands to decompress. 

As this week ended, so did a few things. Not only am I finished with the Pâte À Choux unit, but I'm officially finished with level 1! Starting on Monday, I'll be into level 2 starting with Pâte Feuilletée. 

Stay tuned for my blog next week, and if you want more frequent updates, you can check out my Instagram.

Thanks for reading!

D'Eclair Your Love for Pâte à Choux!

Time sure has gotten away from me since Friday night. I know it's a couple days past Saturday, but I had a super busy past few days, and just haven't had a moment to sit down and get to writing about last week! But rest assured, here it is! (Albeit a few days late).

On Monday night we had our practical for the tarts and pies unit, which was sad, because that meant no more tarts and pies, but was exciting because we were moving into pate a choux! The exam was a lot longer than our last one, we started at 6:15 (this was after our 15 minute written test), and other than our half hour break for dinner at 8:30, grading didn't start until 10! It was a really hectic night, so I wasn't able to get around to snapping a picture until I was finished (more than half an hour early, though!). I made two mini quiche lorraines and a mixed nut tart. We had to present our completed large tart, cut into 10 equal slices, one of those slices on a plate with two rosettes of chantilly, and then our two mini quiches, like so.

My final presentation for the Tarts & Pies unit

My final presentation for the Tarts & Pies unit

I received really good reviews from Chef Jeanne, which I was happy about. I was pretty nervous for this exam, just because the caliber of this exam versus the last one was so much different, but it all turned out just fine. When I got my grades back, I received either perfect or near perfect scores on each section (there were 3), so I couldn't have been happier! While I was a little bummed that this unit was coming to a close, looking back on all of the things that we accomplished in 10 days was incredible!

All the tarts & pies we made! 

All the tarts & pies we made! 

On Wednesday, moving into pate a choux, the first thing that we did, other than making the dough itself, was make eclairs! Pate a choux dough is so strange, I think. It's not the same every time you make it. The main difference being the number of eggs you use. The first time my partner and i made it, we used 7 eggs, the second time, 8, when I've made it at home, I've used 6. It really seems sort of random, but you're looking more for a texture rather than an exact number.

You make pate a choux with a combination of stove top and mixer. You first cook the dough on the stove, and then once it gets to the right texture, you plop (literally) it into the bowl of a mixer and just beat it. This is for two things: one, to cool it off, and two, to add the eggs. We piped 4" eclairs, which seemed like a really huge amount of eclairs, but for some reason once they were baked and even bigger, it felt like less. Weird, right? Maybe that's just me.

Piped eclairs

Piped eclairs

Scored eclairs  

Scored eclairs  

​After we piped them, we had to egg wash them, then drag a fork through in order to score them. It's the same way that you score bread when you bake it. Since pate a choux is a dough that's meant to expand quite a bit, it is going to crack. By scoring it, were just giving it the opportunity to crack a little bit nicer than it normally would if we didn't score. 

​While the eclairs were in the oven, we made the three different fillings for our eclairs: vanilla, coffee, and chocolate. Once the fillings were made, and our eclairs were out of the oven and cooled, it was time to assemble them! The first thing that we did was use a really small star piping tip to drill two little holes in the bottom of the eclair.

Yummy eclair fillings 😋 

Yummy eclair fillings 😋 

Eclairs are ready to be filled! 

Eclairs are ready to be filled! 

After they all had little holes, it was time to start filling them. As expected, you just stick the piping bag of filling into the little holes, and squeeze it until filling comes out the other side. You definitely want to make sure you have full eclairs, because otherwise, you'll just be biting into pate a choux dough, which no one wants. Once they were filled, we had to dip them. The top of the eclairs should be indicative of what's on the inside, so vanilla should be glazed, chocolate should be chocolate, and coffee should be a coffee glaze.These were really pretty after they were done, and man were they tasty! I don't usually like eclairs unless they're filled with straight up whipped cream, but these were delicious!

Vanilla, coffee, and chocolate eclairs! 

Vanilla, coffee, and chocolate eclairs! 

On Friday night, we made three more types of pate a choux pastries: choquettes, choux aux craquelin, and a Paris-Breast. The choquettes and choux aux craquelin were both pretty easy to make, and at the most basic level, were just cream puffs. The choquettes were rolled in pearlized sugar, then baked, then filled with whipped cream in the same method that the eclairs were. The choux aux craquelin were topped with these little colorful circles that were made of almost a shortbread cookie type dough (which we made on Wednesday), then baked, cut in half, and filled with whipped cream.

Choux aux craquelin & choquettes

Choux aux craquelin & choquettes

Those guys were pretty easy to make, but the choux aux craquelin were a little too heavy after I cut them in half and filled them, so I ran into the issue of them falling over a little bit.

Choquettes & choux aux craquelin, baked!

Choquettes & choux aux craquelin, baked!

The other things that we made on Friday night was the Paris-Breast. Chef Jeanne was saying that it came from a bicycle race in Europe from Paris to Breast, and that the thing is supposed to resemble a bicycle wheel. I guess it does, because it's round, but beyond that, I dunno what the resemblance is. The Paris-Breast starts off as a circle of choux, that we egg wash, then top with sliced almonds, then bake.

Paris-Breast is ready to go!  

Paris-Breast is ready to go!  

What's funny, is that this starts off as a 6" circle, but after it bakes, turns into a near-perfect 8" circle. Pretty cool how much choux pastry expands. After it was baked, we made a hazelnut mousseline using this stuff that was almost like Nutella, just without the chocolate. It was almost just as delicious, too!

After its baked... time to cut this bad boy in half!  

After its baked... time to cut this bad boy in half!  

We then cut our circle of choux in half, and piped this hazelnut filling inside. It was a LOT of filling, but it was pretty good. After that was all said and done, we topped it with a very light dusting of powdered sugar, and bam! One completed Paris-Breast.

The Paris-Breast! 

The Paris-Breast! 

This unit is a pretty short one, and is over next Friday, and I'll have another test. Seems like we just started this unit, which is crazy. What is pretty exciting, though, and these first three units make up one level, so after Friday, I'll officially be in level 2! Time just seems to be flying by, I mean, September is almost over!

Stay tuned for my blog next week, and if you want more frequent updates, you can check out my Instagram.

Thanks for reading!

Pie, Pie, Pie – OH MY!

This is it! This week we finally got to dive into making pies. Pie is my absolute favorite dessert (all kinds, I don't really have a concrete favorite). I think if I could eat one dessert for the rest of my life, 100% it would be pie (just don't make me choose one!).  Small side note: has anyone else seen that store Pieology? I legitimately thought that it was a pie store, I was so excited. There's this tiny place in Seattle called Pie that's ~amazing~, so I thought that it was reminiscent of that. Nope. Turns out it's pizza. I'm just a little bit bitter. LOL 

Working on a crust design

Working on a crust design

But anyway! Onto this week. With Monday being a holiday, we had a short week this week, but with all of the stuff we managed to get done, it sure didn't feel like it! Wednesday was #PieDay, which was just beyond exciting, we had 4 pies on the roster: apple, lemon meringue, pumpkin, and caramel apple streusel. We only managed to get to 3 of the pies, but heck, who cares? That's still 3 pies in one day! It was a busy night, to say the least. We started off with rolling out and placing our pie crusts in the pans. Then, we got to add little decorative borders to them, if we wanted. 

Making pie is one of my favorite things (hello upcoming holidays!), and decorating the crust is even more fun! It's like a little mini art project, sort of, and I love me a good art project. I think I was a little ambitious, but I also think that it paid off; I loved how my crusts turned out! I was braiding crust, cutting out leaves, cutting out triangles, the whole shebang! 

Pumpkin, lemon meringue, caramel apple streusel, and apple pies // before & after!

Pumpkin, lemon meringue, caramel apple streusel, and apple pies // before & after!

The three pies that we did to completion on Wednesday were the apple, lemon meringue, and caramel apple streusel pies. We did do the first bake on the pumpkin pie crust, as well, but we ran out of time on Wednesday to get that one finished. We were given the different options for our quiz (which is on Monday!), and we got to draw numbers on Friday. Sad to think that the tarts and pies unit is coming to an end, but next week we get to start pate a choux, which I'm definitely looking forward to. 

Pumpkin pie, pre-baked

Pumpkin pie, pre-baked

On Friday, we started off finishing up our pumpkin pies. On Wednesday, Chef Jeanne made a gigantic batch of pumpkin pie filling, so it was one less thing we had to do. After we had those setting up, we made two batches of dough. One, that we'd use to make our mini quiches, and the other for our test on Monday. On Friday, we made whole wheat crust for the first time. This crust was going to be used in our spinach and goat cheese quiches. After we made our crusts and got them chilling in the fridge, we had a 45 minute lecture on nutrition. 

After our lecture was over, we had about 25 minutes left before dinner, so we blind baked our crusts for the quiches, and while those were baking, we got everything prepped out for the rest of the quiches. For the Lorraine, that was the egg custard mix, Gruyere, and bacon, whereas the other one, there was spinach, shallots, goat cheese, and the egg custard mix for that, too. 

Mmmmm... Bacon and cheese!

Mmmmm... Bacon and cheese!

After dinner, we assembled our quiches and put them in the oven, then while those were baking for the second time, we whipped up a quick batch of chantilly creme to decorate our pumpkin pies with! Friday was definitely a more laid back night that I'm used to, but nearing the end of the unit, there really isn't that much to do. The quiches were pretty quick to assemble, at least I thought. 

Lots of little quiches! YUM!!

Lots of little quiches! YUM!!

We had a little guessing game, too. After the quiches were finished, we had to guess which one was more nutritious. Almost everyone thought that it would be the spinach and goat cheese, however, we were wrong. Surprisingly enough, in term of calories, the quiche Lorraine was actually better for you. But really, the difference was so minute, it hardly makes an actual difference, at least I think. 

After that we drew our numbers for the practical portion of our test on Monday. There were 4 possible combinations of a large tart and two tartelettes, and I was hoping that I would get either the one wth the chocolate ganache tarts or the one with quiche Lorraine, and lucky enough for me, I randomly picked the one with quiche Lorraine! More quiches for breakfast for me! Woohoo!

All we did the rest of the night was go over material that was going to be on the written portion of our quiz. It was a pretty low key night, and week, as a whole. Come Monday, after our test is over, we'll get started on the pate a choux unit! 

Stay tuned for my blog next week, and if you want more frequent updates, you can check out my Instagram.

Thanks for reading!

Very Busy Bakers!

This week in school, we found ourselves smack-dab in the middle of the pies and tarts unit, and I think this has been our busiest (and longest) week to date! I feel like I say that every week, so apologies if I do, but it's really hard to believe how hectic the days can be. This week, each person made 9 tarts! That's an average of 3 tarts a day, which is totally insane. I'm bringing so much food home, it's hard to believe that it all actually gets eaten. 

The end of this week also marks my 4th week (aka, first whole month) in school, which is pretty exciting! It seems like time is just flying by -- I mean, one month gone, already. Last night, Chef Stephany said that she thought that the night classes go by so slow. Maybe I don't feel that way since I have no basis of comparison, but I really feel like I'm going to be finished with this program before I know it. 

A creamy almond pillow

A creamy almond pillow

But all that aside, let's get into the baking this week! Monday started off with making some cherry compote and a brand new batch of almond cream. Remember how I described it as a small pillow last week? Well, this time around I actually managed to get a picture after it was all wrapped up! See? Pretty pillow-like, I think. This batch seemed a little smaller than the one that we made last week, but I could be totally wrong. We used a different method to make this one (using almond meal instead of almond paste), so that could be why... less voluminous. 

A nice stiff-peaked meringue.

A nice stiff-peaked meringue.

From there, we went on to make our first meringue of the course. For Monday, both the tarts that we made were pretty much entirely based around meringue. We made a Galette Flamande, which is a thin layer of tart dough on the bottom, then that cherry compote we made is sandwiched between two layers of a meringue / almond cream mixture, then the top is sprinkled with almonds, and finally is dusted with powdered sugar. Our other tart of the night, the mixed nut tart, was the same meringue, except this time it was mixed with a combination of almond cream, almond flour, and hazelnut flour all spread over a very thin layer of raspberry preserves and sliced almonds. We had to whip our meringues to stiff peaks, so that it would stand up on end, like so. 

The Galette Flamande was pretty before it even went into the oven, so I could only imagine what it was going to look like after that meringue had gotten a nice golden brown color on it. As expected, it was even prettier after it came out of the oven. It was so tasty, too! Chef Jeanne cut her tart into a bunch of little pieces so we could all try a bit, and what a treat that was. 

Galette Flamande, post bake. Y U M !

Galette Flamande, post bake. Y U M !

Mixed nut tart, inside and out

Mixed nut tart, inside and out

When we moved onto the mixed nut tart, it was a pretty simple tart. This one sort of had a "brunch" vibe. Not overly sweet, and you probably wouldn't feel too guilty about eating a big chunk of it for breakfast. Just from looking at it, you'd never know that it had a really beautiful layer of raspberry and almonds on the inside. But I guess the saying stands, never judge a book (or a tart, in this case), by it's cover! 

The last thing that we did on Monday night was make a new tart dough that we would be using on Wednesday, and that was a pretty quick, easy thing to do. By now, we're all pros when it comes to making dough. This dough in particular was a sablée, and much like the cookie dough we made back in week one, it had a very sandy texture, hence the name (sablée means "sandy" in French). 

Sablée dough! Nice and sandy

Sablée dough! Nice and sandy

Wednesday definitely was the busiest day this week -- so much so, that we didn't even leave the classroom until 11:50, which is almost an hour later than we're supposed to be finished. Since we had so much to do, I didn't get a chance to snap too many pictures, but I was able to get a few. 

Making candied lemon peel

Making candied lemon peel

The first thing that we got started with on Wednesday evening was making our candied lemon peels for our lemon curd tartelettes. We made sure to get this going first, because according to our recipe, it had to cook in the syrup for up to two hours, which is almost half the time that we have in the kitchen each day. To get going on that, we peeled our lemons, removed as much of the pith as we could, blanched them 2-3 times, julienne'd them, put them in simple syrup, and cooked them over low heat for a little over an hour. After all that was said and done, we strained them from the remaining syrup, and rolled the lemon peels in sugar to give them that "candied" look. I thought that they sort of looked like Sour S'ghetti, which is one of my favorite candies. The lemon syrup that was remaining after we strained them could make something really delicious, I'm sure, I'm just not really sure what. Maybe it would be good in a cocktail or something, I dunno. 

Caramel is in the works! 

Caramel is in the works! 

After we had our lemon peels simmering, we went on to making the caramel for our caramel nut tart! I've made caramel a handful of times at home, but it never sets up as much as I'd like (or need) it to, so maybe this will be my journey down the path of being able to successfully make caramels at home! Caramel is such a temperamental thing too, and it can go wrong so, so quickly. Fortunately, I didn't have to remake mine, and it went smoothly the first time, but it wasn't such for everyone. Chef Jeanne said that she wasn't even 100% sure why some of the caramels we're working right, they're just that temperamental of a thing. But when all was said and done, we mixed walnuts into the caramel (hence caramel nut tart). This gave it sort of a sweet / salty vibe. I decided to add an extra pinch of salt to my caramel, for a more enhanced flavor. I have to say, I think I made the right call.  I realized after the fact that I didn't actually take a picture of the tart when it was finished, but I did get a picture before I put the almond cream on top. It has a nice thick layer of caramel, countered with a thin layer of almond cream. Very tasty, indeed!

Caramel nut tart, before the almond cream layer was put on top

Caramel nut tart, before the almond cream layer was put on top

Gelatin sheets -- almost invisible! 

Gelatin sheets -- almost invisible! 

After those tarts were in the oven and baking we went on to make our lemon curd for the tartelettes. I have to say, I'm not usually one to like lemon-y flavored things, but this lemon curd was actually pretty delicious! We did a blind bake on the shells, since the filling doesn't get cooked again, so once the lemon curd was finished, we could just pour it into the shells so they could set in the freezer. The coolest part about the lemon curd was probably using the gelatin sheets. Whenever I've baked in the past with gelatin, I've just used the little pouches of Knox gelatin that you can buy at the store. I'd never seen a gelatin sheet (or heard of one, to be perfectly honest) before, so I was pretty excited to give them a try! You bloom the sheets, just as you would with any other gelatin, and then just stir them into your mix (lemon curd, in our case). I didn't think that they were going to dissolve, at first. They almost felt like rubber. But sure enough, with a little bit of stirring, they disappeared. 

Lemon curd tarts, before we torched the meringue. 

Lemon curd tarts, before we torched the meringue. 

After the lemon curd was setting in the fridge, we made our Swiss Meringue. We started this just a little bit after 11:00pm, and we all thought that we'd be done by 11:10, 11:15 at the latest. The meringue took a little longer than expected to come together, and we all must've gotten caught up in the piping and torching of our meringues, because like I said, we didn't get out until 11:50! A late night, but well worth it, I think. It was pretty fun torching the meringue and watching it go from this pristine white fluff, to a nicely browned color.

On Wednesday, we also made two doughs that we would use on Friday: the Linzer dough and a chocolate sablée. The Linzer dough was SO MUCH WORK. We had to hard boil eggs, let them cool, peel them, and sift the hard boiled egg yolks. Yes, I did say sift. We basically had to smash the egg yolks through a sifter so they were a egg yolk-y flour type thing. It was super strange. Tasty dough, though. It was a lot of work, but well worth it. 

Teeny tiny lemon tarts!

Teeny tiny lemon tarts!

On Friday, we had a lot less intricate work to do, so it was going to be a nice way to end the week. We made two tarts, the Linzer and then a chocolate ganache tart. I was most excited about the Linzer tart, probably just due to the lattice top. It's one of those things that reminds me of pie, and I LOVE pie. It's my absolute favorite dessert, and it's what we'll be getting into next Wednesday when we come back for class (we have Labor Day off). 

Bloo -- I mean, raspberry compote ;)

Bloo -- I mean, raspberry compote ;)

After spreading a thin layer of almond cream along the bottom of the tart shell, and then topping it off with raspberry compote, it was time to start the lattice! Before I get into that, interestingly enough, when we made the raspberry compote, one of the main ingredients in it was apple compote. We made the same apple compote as we did when we made the apple tart, and then added raspberries, pectin, and sugar. We cooked this mixture until it was nice and thick, and used an immersion blender to get the last of the apple chunks out. That's one thing that I really need to get. I've been meaning to buy one for awhile, and I think they're just super useful. Plus, I can get it in Candy Apple Red, which is my dedicated small kitchen appliance color ;) But ANYWAY, back to the compote. You'd have absolutely no idea that there were apples in this mix. It tastes amazing, and just like raspberry jam would. It's amazing!! When we poured it out to cool, I sort of thought it looked like a big 'ol pile of fake blood, which was pretty funny. Assembling the tart was pretty easy, then we just stuck them in the oven to bake and went off to dinner! 

Step by step Linzer tart!

Step by step Linzer tart!

Chocolate on chocolate on chocolate!

Chocolate on chocolate on chocolate!

When we came back from dinner, we assembled the chocolate ganache tart. That just sounds good thinking about it... who doesn't like chocolate?? This was like chocolate overload, too, because it was chocolate ganache in a chocolate crust. My table partner had some little gold flecks that he let me borrow to top my tart off which, so it was a lil' extra fancy! He and I were the first ones finished with our ganache and getting our tart in the fridge to set, so we helped Chef Stephany made a bunch of tiny cornets for the class to use to decorate our ganache tarts with white chocolate. 

Pie dough, prepped and ready to go for next week! 

Pie dough, prepped and ready to go for next week! 

The very last thing that we did on Friday was make our pie dough (!!!!). Like I said, I love pie! I'm so excited that we get to get started on that next week. We're going to be making 4 pies on Wednesday, which is totally crazy! Granted, they're 6" pies, so they're smaller than your regular pie would be, but that's still a ton of pie! Oh my gosh, I can't wait. I'm getting toward the end of the tarts and pies unit, so our test is coming up pretty quick. I know for sure that we have the Tarte Bourdaloue as one of the items on our practical, but I'm sure that there will be something else. We just don't know what yet. After this unit, I think that we move into Pate A Choux.

Stay tuned for my blog next week, and if you want more frequent updates, you can check out my Instagram.

Thanks for reading!

School Has TART Me A Lot!

Please excuse the lame pun, but I had to! It's been a full-blown tart week!! This week in school has been crazy busy, but I think that it's been my favorite week to date! Like I said in my last post, I'm a sucker for pies (and tarts) and that's what we've been doing all week! Our unit on pies and tarts is 10 days long -- double the length of the cookies unit. I can't wait to see what we get into next week, because this week has been filled with so many delicious sweet (and savory) treats! 

Rolling out dough for tart #1! 

Rolling out dough for tart #1! 

Monday we ended up taking home two tarts, one sweet and one savory. There was a LOT to do to get those tarts completed, though. Thankfully, we made plenty of dough last Friday so that was one less thing that we had to do. All we needed to do was get it rolled out and in the tart ring. I've never made a tart in a tart ring prior to school. I usually make pies, but I've made a tart on a couple occasions, however I've only used those pans with the fluted sides and the removable bottom. I have to say, a tart ring is a million times easier, at least I think! Our first step for our first tart of the week was to roll out our dough. Rolling dough out into a circle is harder than I imagined. Whenever I've made pies or tarts in the past, I always end up with an "amoeba shape." You know, those funky, misshaped blobs. Yeah, my dough always looked like that, but it's never really presented an issue. In school they want us to try for a circle, and by the end of this week, I have a much better handle on it, but it wasn't easy the first time. Once our dough was rolled out, put in the ring, and stuck in the fridge to chill, it was time to poach our pears for the Tarte Bourdaloue! 

Poaching pears

Poaching pears

v1_-2l.gif

After our poaching liquid was made -- which consisted of wine, water, sugar, and a vanilla bean, we plopped in our pears and made a cartouche, and just let them sit in the liquid for awhile. This way, they had time to absorb all those delicious flavors! While the pears were poaching, we put together our onion tart. To be honest, I wasn't sure how I felt about this one. I'm not a big fan of tomatoes or blue cheese, but I gave it a try. Definitely wasn't bad, but personally, I couldn't eat more than a slice or two.

Not that it tasted bad, but it just wasn't my thing. Since this was a free-form tart, rather than one that we make in the rings, Chef Jeanne was joking that if it wasn't perfect, we'll just say it's "rustic." Pretty funny, and it's true, I think. Everything is "rustic" nowadays. We formed our tart shell by hand, then layered in all the ingredients -- caramelized onions, chopped walnuts, tomatoes, and blue cheese.

We took our dinner break, and when we came back, it was time to get our Tarte Bourdaloue finished! We pulled our tart rings out, and leveled them so there wouldn't be any excess dough, and made almond cream in the mixer to lay on the bottom of the tart shell. This was an utterly comical experience. We made a HUGE batch of almond cream, so much so that when all was said and done (and wrapped in plastic wrap), you could've mistaken it for a small pillow. Since the method we used to make almond cream required almond paste, it and there was just so much if it, it just barely fit in the mixer. There were definitely times that my partner and I had to hold our hands up to the sides of the bowl to keep it from spilling out.  

Tart Bourdaloue, step by step!

Tart Bourdaloue, step by step!

This tart is was probably my favorite one we made this week. Not only was it pretty, but it tasted so good! I love pears, and this just took them to the next level. Chef Jeanne said that this one is going to be on our test at the end of the unit, so I'll definitely be making it again at home to get some more practice. 

Pastry cream

Pastry cream

On Wednesday, it was even more busy! Hard to believe, really, but we made four tarts each! Granted, two of them were lil' baby tarts, but still! The first thing that we did, after rolling out our dough, of course, was make pastry cream! While we were making the pastry cream, we did blind baking on our tart shells. This meant that we baked them first, without filling, just to get the structure set, then we can either continue to bake at a later time with a filling (like the almond cream layer on the big fruit tart), or just fill as is (like the banana cream and small fruit tarts). 

This was the first of 3 types of custard that we'll make over the course of the program. There's stirred, baked, and starch-based. The pastry cream that we were making on Wednesday was a starch-based custard, because it had pastry cream powder to bind it together. Even Chef Jeanne said she wasn't 100% sure what was in it, but when it's cooled, it's almost like a piece of rubber, it's really strange, honestly. I was able to get a close up picture of it, and you can just see the little vanilla bean seeds suspended in it, which I thought was really cool. We used this cream in two different ways on Wednesday night: just by itself on the fruit tarts, then in a banana cream tart, we folded the pastry cream together with some unsweetened whipped cream (which was whipped by hand!), for a slightly lighter texture. 

Step by step fruit tart

Step by step fruit tart

Banana cream tart

Banana cream tart

After the fruit tart was all assembled, we brushed it with a nappage (apricot glaze) so it was nice and shiny! Then from there, we assembled our banana cream tarts! Now, I'm not the biggest fan of cream pies and tarts, in general. There's only been one banana cream pie I've ever liked, and it was one that I made in a class at Sur La Table (recipe here, for those interested), so I had pretty high hopes for the one we were making in class. Like I said before, for the "cream" part of this pie, we mixed our jelly-like pastry cream with some unsweetened whipped cream to get a nice, light creamy texture, then we folded in our bananas, and then topped it with sweetened whipped cream. Phew, that's a lot of cream. When all was said and done, it was delicious. I actually loved it, and it's something that I would totally make again. That's now two banana cream pies / tarts that I really enjoy! Woohoo!

Moving onto Friday, it was a little more hectic than anything, not super busy, per se. When we first got into class at 6, we went in and took our ServSafe Manager's exam. We've been leading up to this test pretty much since our first week here. We had some sort of lecture almost every day on the topics. Some days we were a little pressed for time, so we also have a book that we were given on the first day to study from. I think that I passed, at least I hope. It was 90 questions, and we had two hours to finish it. We only need to get a 70% to pass, and every practice test I took, I got at least an 85%, so I think I'll be okay. We get our results in a couple of weeks, via email. 

After the test though, we had lost two hours of time, which when you only have 5 hours to work with, that's a huge chunk! We got right into prepping for our recipe for the day, which was supposed to be a Tarte Alsacienne, which is basically a custard apple tart sort of thing. The problem was, there were only 7 apples, when we needed 28. Whoops. There was a mix up of some kind, but instead of making one of those tarts per person, instead, one person per team made a Tarte Alsacienne (with either apples or pears, since we were short on the apples) and the other person made a Quiche Lorraine because Chef Stephany found a ton of bacon and gruyere in the store room that no one had labelled for anything. We make do with what we have! We'll make the quiche again, on day 9 of the tarts and pies unit, but that's totally fine by me :) I love quiche, so there were no complaints here!

Perfectly peeled pears!

Perfectly peeled pears!

I worked on the pear version of the Tarte Alsacienne while my partner worked on the Quiche Lorraine. I tried to grab two plump, evenly shaped pears. I remember from the Tart Bourdaloue, that it's a little more difficult to make things pretty if you have wonky shaped pears. Fortunately, I was able to find two really nice, similarly shaped pears, that were just beautiful. After they were peeled, cored, and sliced into wedges, we caramelized them in a pan, then we got to flambé them!! Yes, FLAMBÉ! Fire! I've never flambé'd anything before, so this was super exciting for me. 

Now, you might be thinking, how the heck do you flambé with an induction stove? You get creative, that's how. It was a two step process of pouring our brandy over our fruit, then hitting it with a torch instantly. My partner was the one doing this, so I was able to get a picture, which was really neat. Once our pan was like, we had to yell FLAMBÉ! It was pretty cool, I've gotta say. Everyone ended up chiming in every time somebody's pan was lit on fire, which was a lot of fun!

FLAMBÉ!!! 

FLAMBÉ!!! 

Quiche Lorraine, aka: my breakfast

Quiche Lorraine, aka: my breakfast

After that, we spread the fruit into a pan to cool off, and we made two custards: one for the fruit tart and one for the quiche. After that, it was a pretty quick process of getting them in the oven. Arrange your fruit / bacon and cheese on the bottom of the tart shell, pour the custard over the top, and pop it in the oven. We baked them until there was no wiggle or jiggle in the custard, and that was it! Since we weren't able to each take home our own tart, we split them in half, and we each got half a Tarte Alsacienne (with pears) and half of a Quiche Lorraine. I had a piece of the quiche for breakfast this morning, and it was quite tasty! 

And that's a wrap on this week! We made up a quick batch of dough to use next week, and we got cleaned up, and were able to head home a couple minutes early!

Stay tuned for my blog next week, and if you want more frequent updates, you can check out my Instagram.

Thanks for reading!

Tarte Alsacienne (with pears)

Tarte Alsacienne (with pears)