Okay, moving forward onto the next blog. Playing catch up is pretty difficult, I must say. I've been so busy lately, it's hard to find time to sit down and write, but I have a few hours this morning, so my goal is to have you guys all caught up by the end of today. So, here we are at week 2 of cakes 1! This is the last week of cakes, at least for right now. The cake unit gets split into two, like I said in my last post. One more focused on baking and structure, while the other cake unit is more decorative. By the end of this week, I'll have brought 5 cakes home. That's an average of 1.67 cakes per day! Which, by the way, is an absurd amount of cake for 4 people to eat. But enough of my rambling, let's get going through what I did this week!
On Monday, the first thing that we got working on was the marjolaine. Last week when we made the bigger, rectangular sheets of meringue, this is what those guys were for. The marjolaine is a super complex, layered cake, with so many delicious fillings. I had never had anything quite like it! The nine layers go like this: chocolate genoise, chocolate ganache, meringue, creme d'or (which is like chocolate whipped cream), meringue, praline buttercream, meringue, stabilized whipped cream, meringue. Phew! Then that entire thing is set to hang out in the fridge until Wednesday so that the fillings set up nicely. There's still a lot to do to tackle this cake, but trust me, it'll be worth it when it's done!
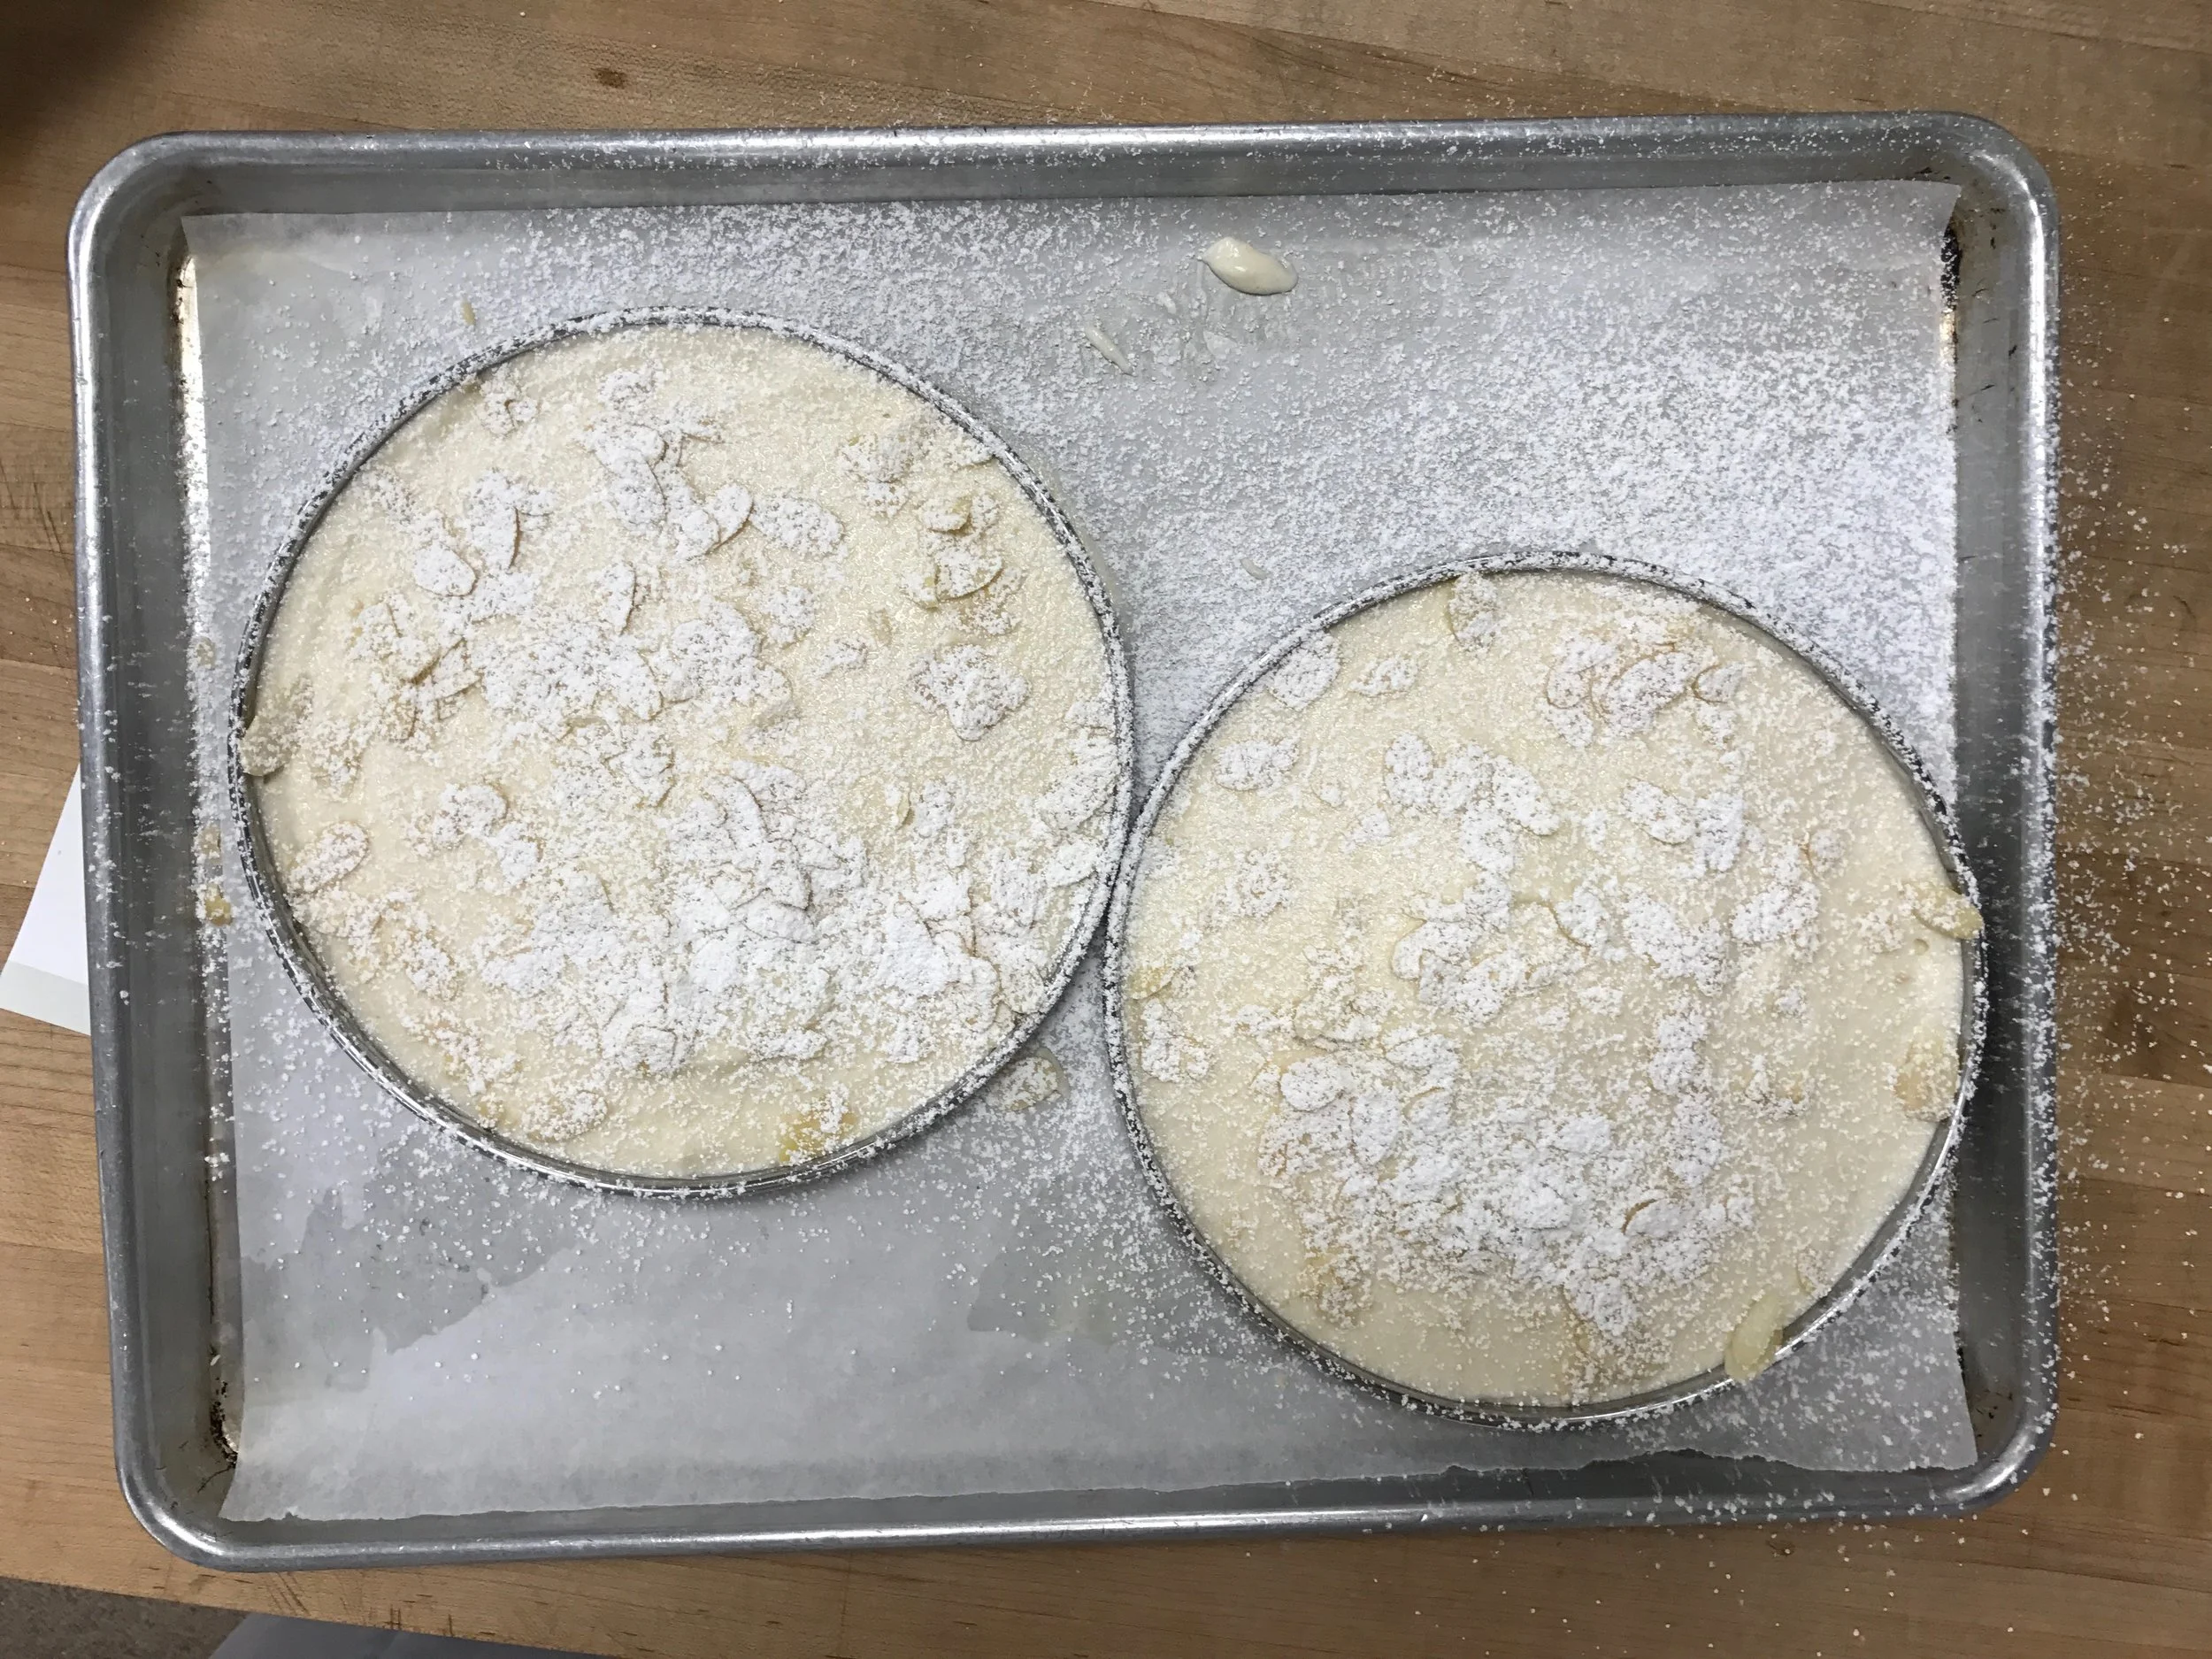
From there, we got working on a flourless chocolate cake. I, for one, really enjoy flourless chocolate cake. It's nice and moist, dense, and delicious! I also really like chocolate lava flow cake, but that's another story entirely. This wasn't the only chocolate cake that we worked on on Monday night. We also put to use the rest of that sheet pan of chocolate genoise that we made last week. In addition to the rectangle that we cut out for the marjolaine, we cut out 3 circles for a chocolate ganache cake. This cake was pretty interesting because we built it inside of a cake ring. First we lined the ring with whipped chocolate ganache, then started to stack the cake inside of that ring. This way, once the cake was 100% set (we let it sit in the fridge until Wednesday, just like the marjolaine), we could slide the ring off, and we'd have a perfectly smooth cake exterior.
This chocolate ganache cake was just alternating layers of chocolate genoise and whipped chocolate ganache. If you didn't think that was enough chocolate, just wait until it gets finished on Wednesday; you'll be in for a real treat!

Candied rose petals, anyone?
By this time, our flourless chocolate cake was out of the oven. While it was cooling, we got to candy some rose petals that would go on top of the chocolate ganache cake! Just a side note, roses are my absolute favorite flower, as cliche as it is. I was super excited about this because not only are rose petals really pretty and smell amazing, we got to take home the extra roses from class that we didn't candy. In order to candy the rose petals, all that we did was take the individual petals, brush the very lightly in egg white, and then tossed them in sugar. We let these guys sit in dry storage until Wednesday night (which if you can't tell, sitting until Wednesday night is a theme here).
Once our flourless chocolate cake had cooled and we had prepared our creme d'or, it was time for assembly. We cut all of those meringue logs that we made last week into shorter segments. It was sort of random and a matter of personal preference. Once the cake was iced, we stuck the logs all around the side, and then piled a bunch of them on top. That's a wrap on Monday!

Flourless chocolate cake... MMMM

Marjolaine cross section
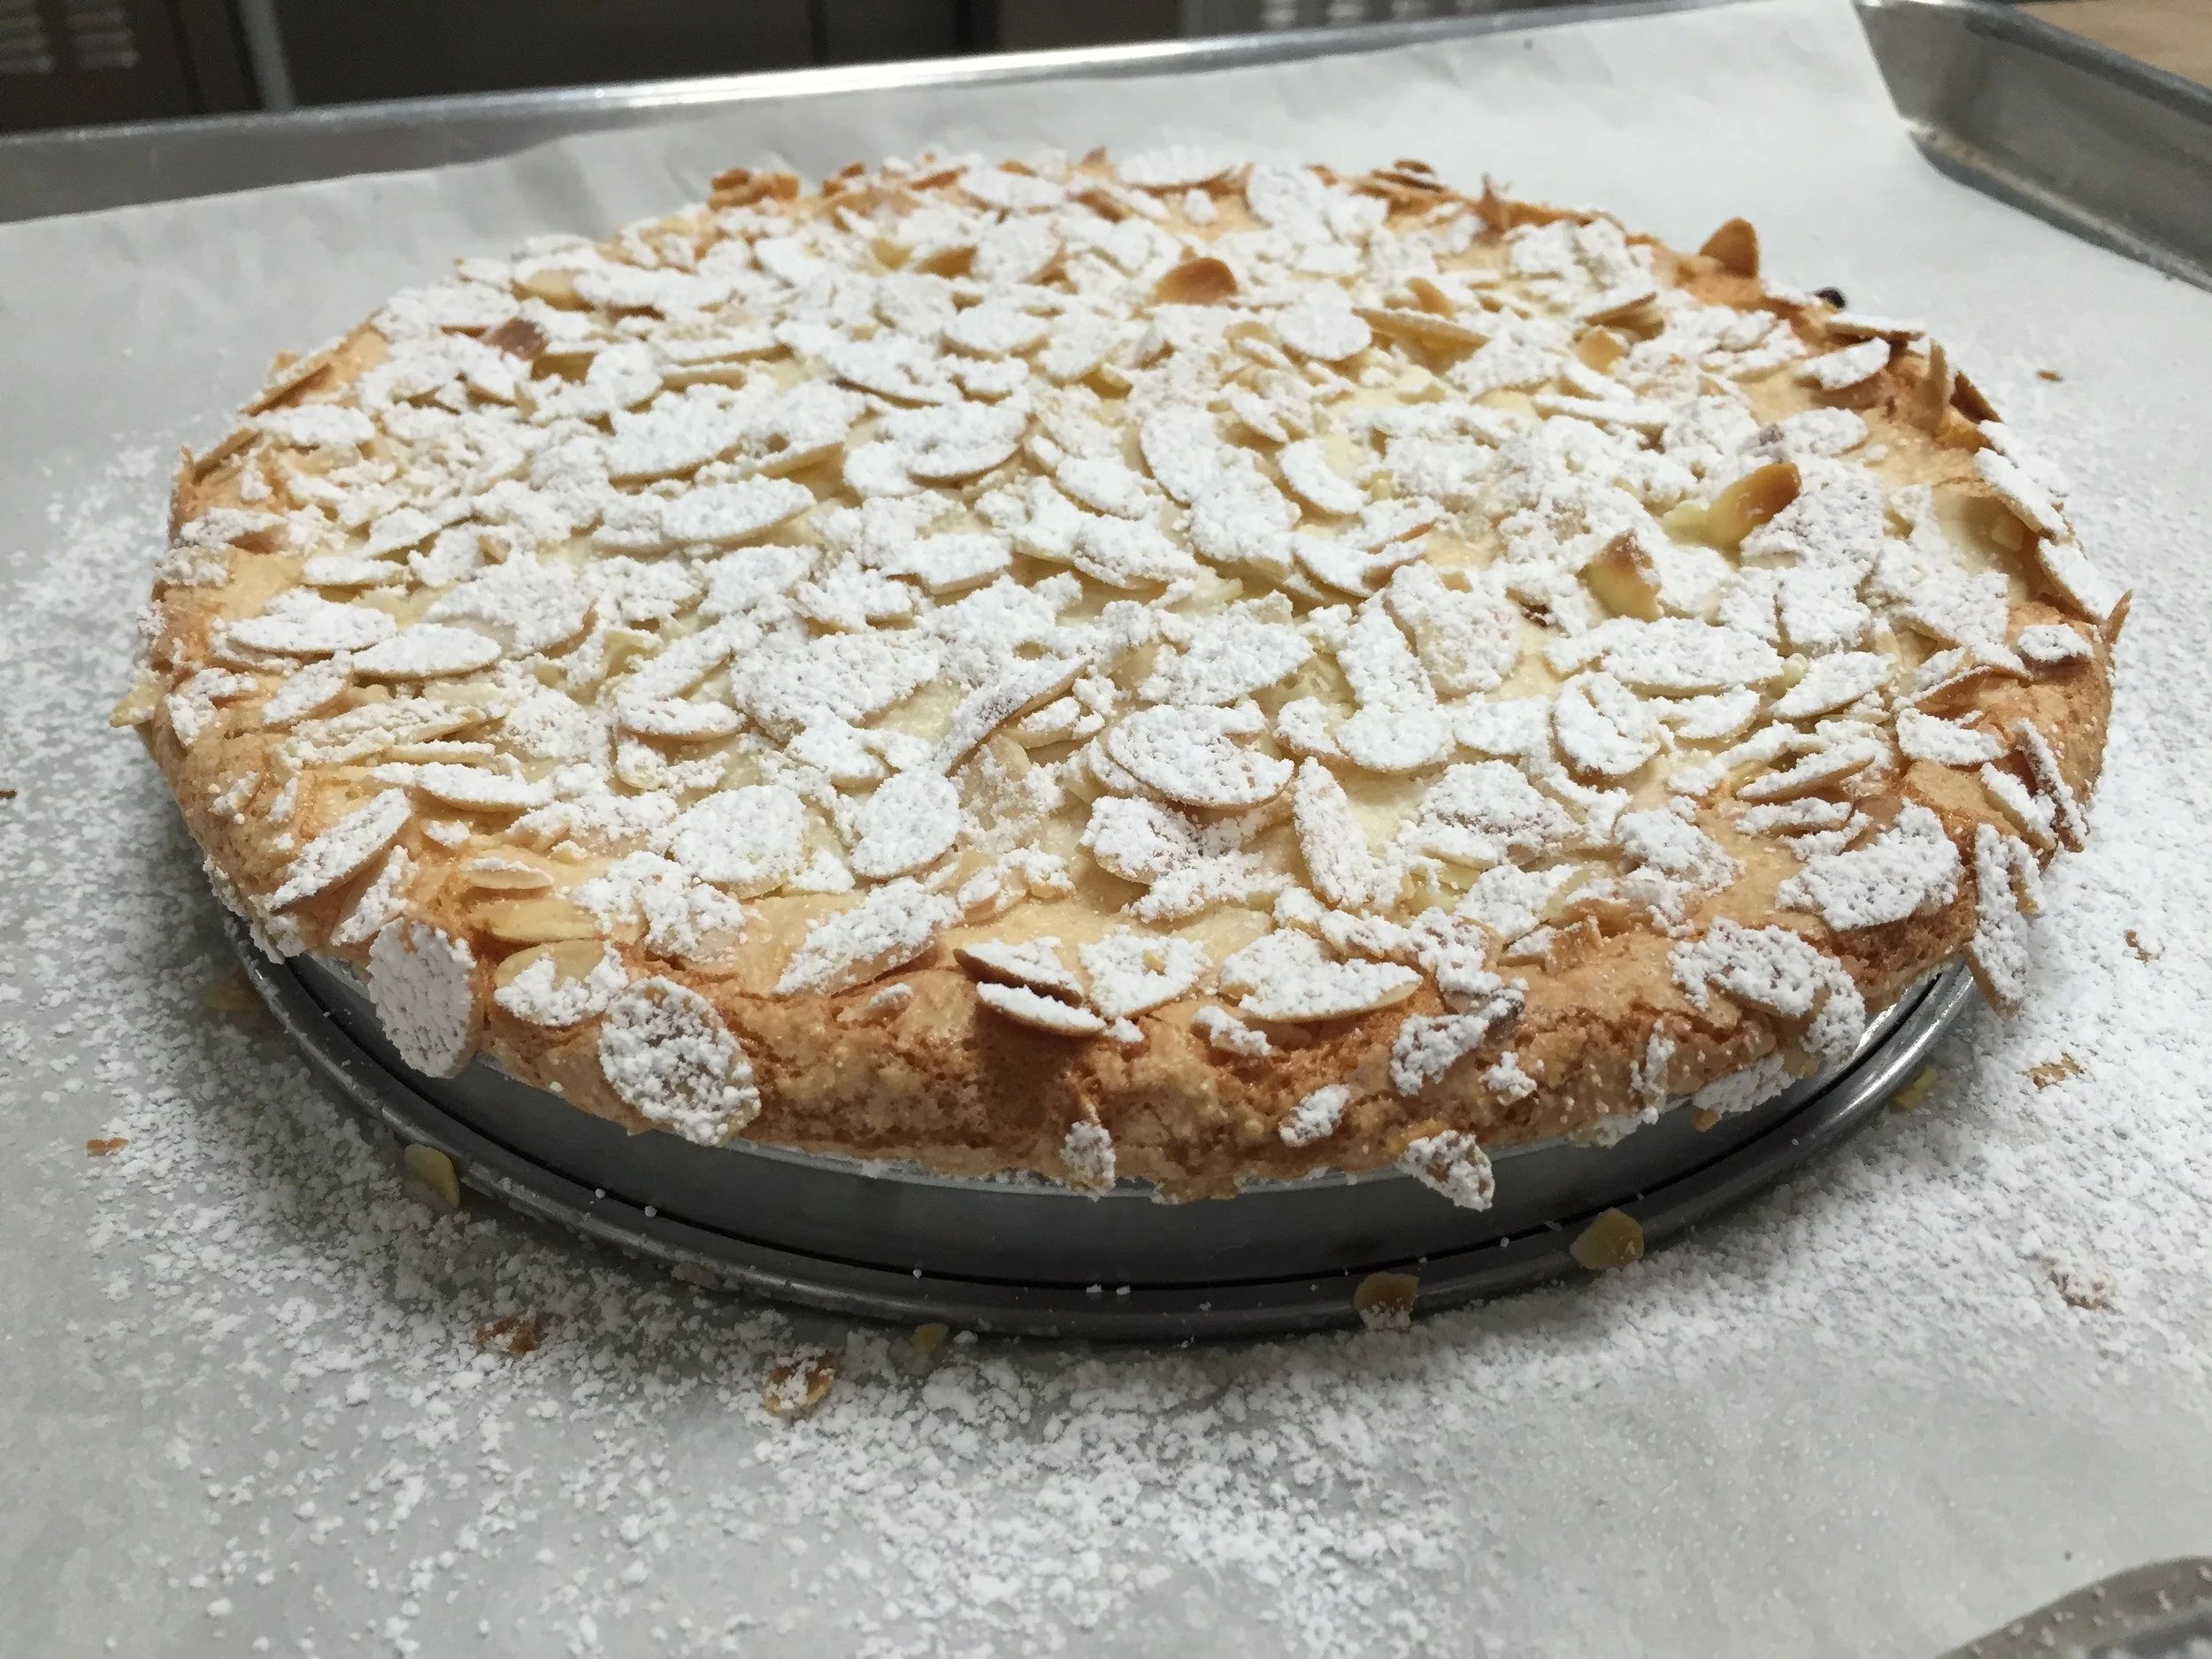
On Wednesday, I took home 3 cakes: the marjolaine, a lemon chiffon, and a whipped chocolate ganache cake. All of which we started on Monday (I told you that there was a theme going on here). The first thing that we got started on was the marjolaine. Since this guy had been chilling in the fridge since Monday night, it was nice and firm. We had to trim the cake down so that the filling would be even all the way around. Everybody had a little bowl of cake scraps from trimming the cake. It was quite delicious, we all had a few nibbles ;) Once the marjolaine was trimmed, we had to crumb coat the entire thing with more of that praline buttercream. The goal was to get it as smooth as possible, since this cake, just like the whipped chocolate ganache cake, would get a nice layer of chocolate poured over the top as the outer-most icing.
While the crumb coat on the marjolaine was firming up in the fridge, it was time to unmold the chocolate ganache cake. Since the cake was adhered to the cake ring, we had to heat it up with a kitchen torch. This was a really delicate process because heating it too much would cause all the ganache to melt, but not heating it enough would cause the cake to break when pulling the ring off. Fortunately, no one had a melting cake incident, and all of the cake rings came off just fine.
Glazing the marjolaine
Once the cake was out of the ring, we had the marjolaine and the ganache cake lined up, since those were both getting glazed with the same chocolate over the top. It was a little nerve racking to glaze them, to be honest. You didn't have much time to get all of the chocolate on there before it started to harden. Even worse, was that when you had to remove the excess chocolate off of the top, you had one shot at swiping the chocolate away before it solidified. Pretty scary, but I was able to get it done.

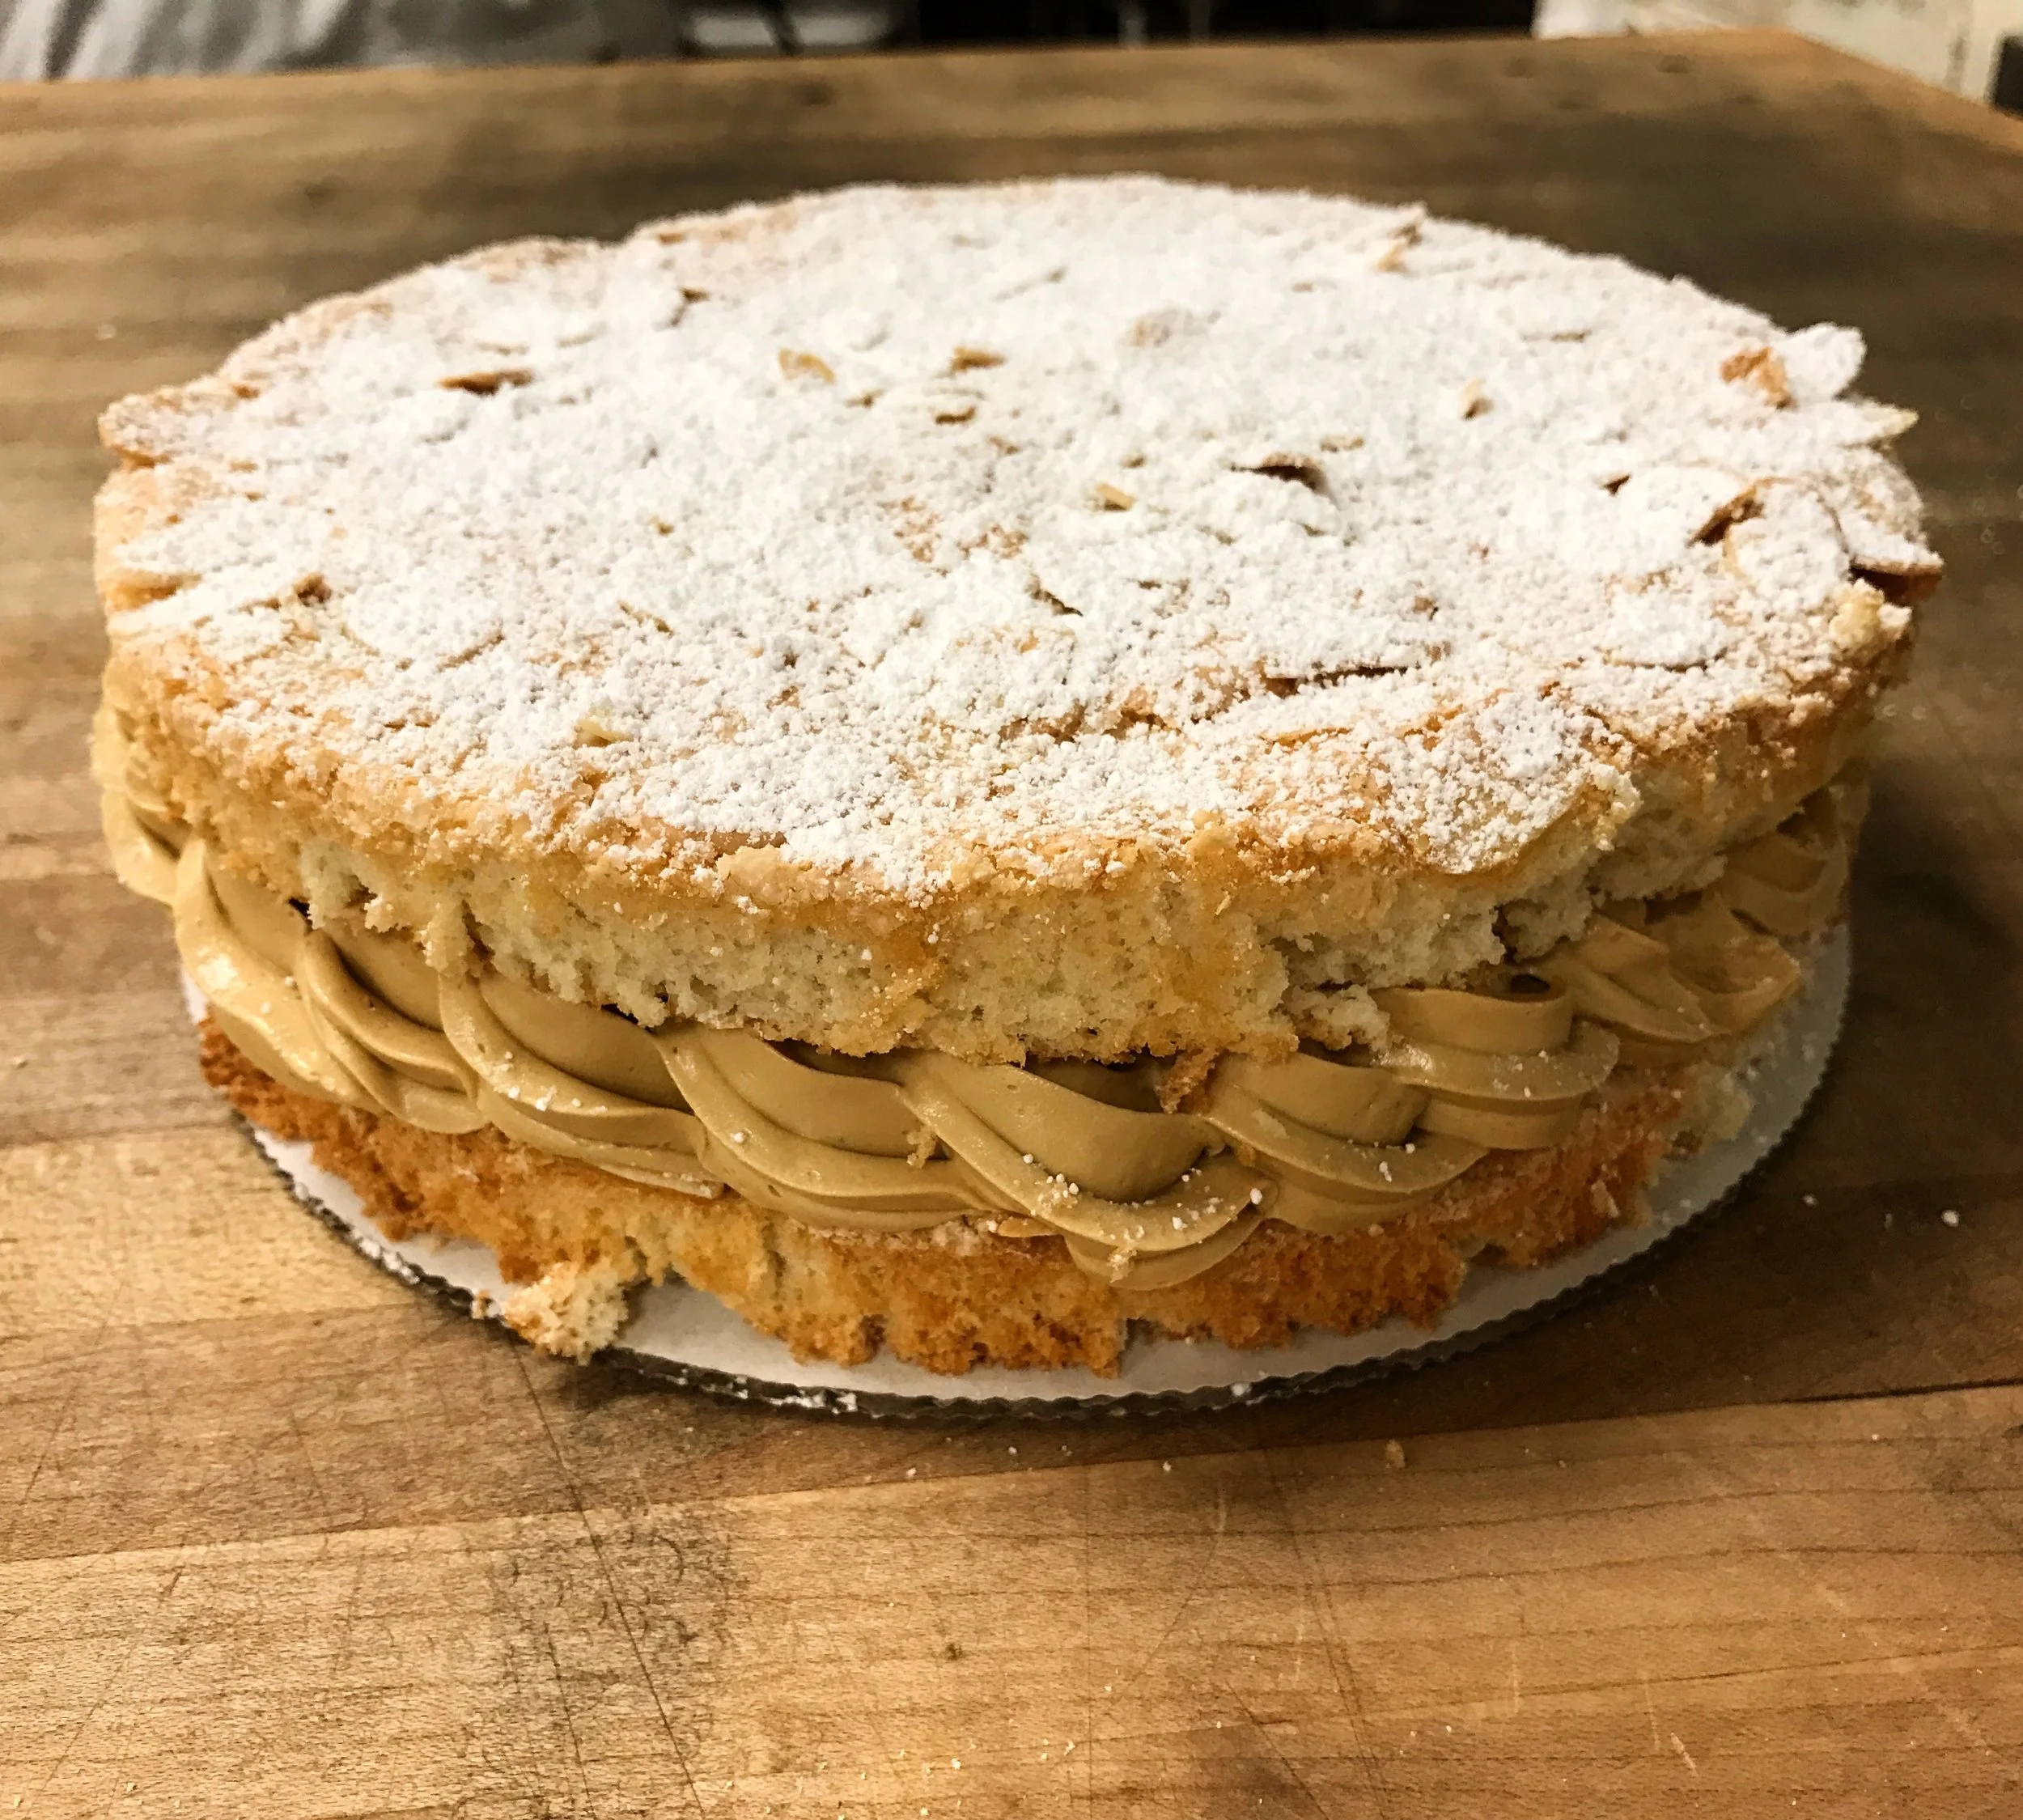
Fully assembled whipping ganache cake
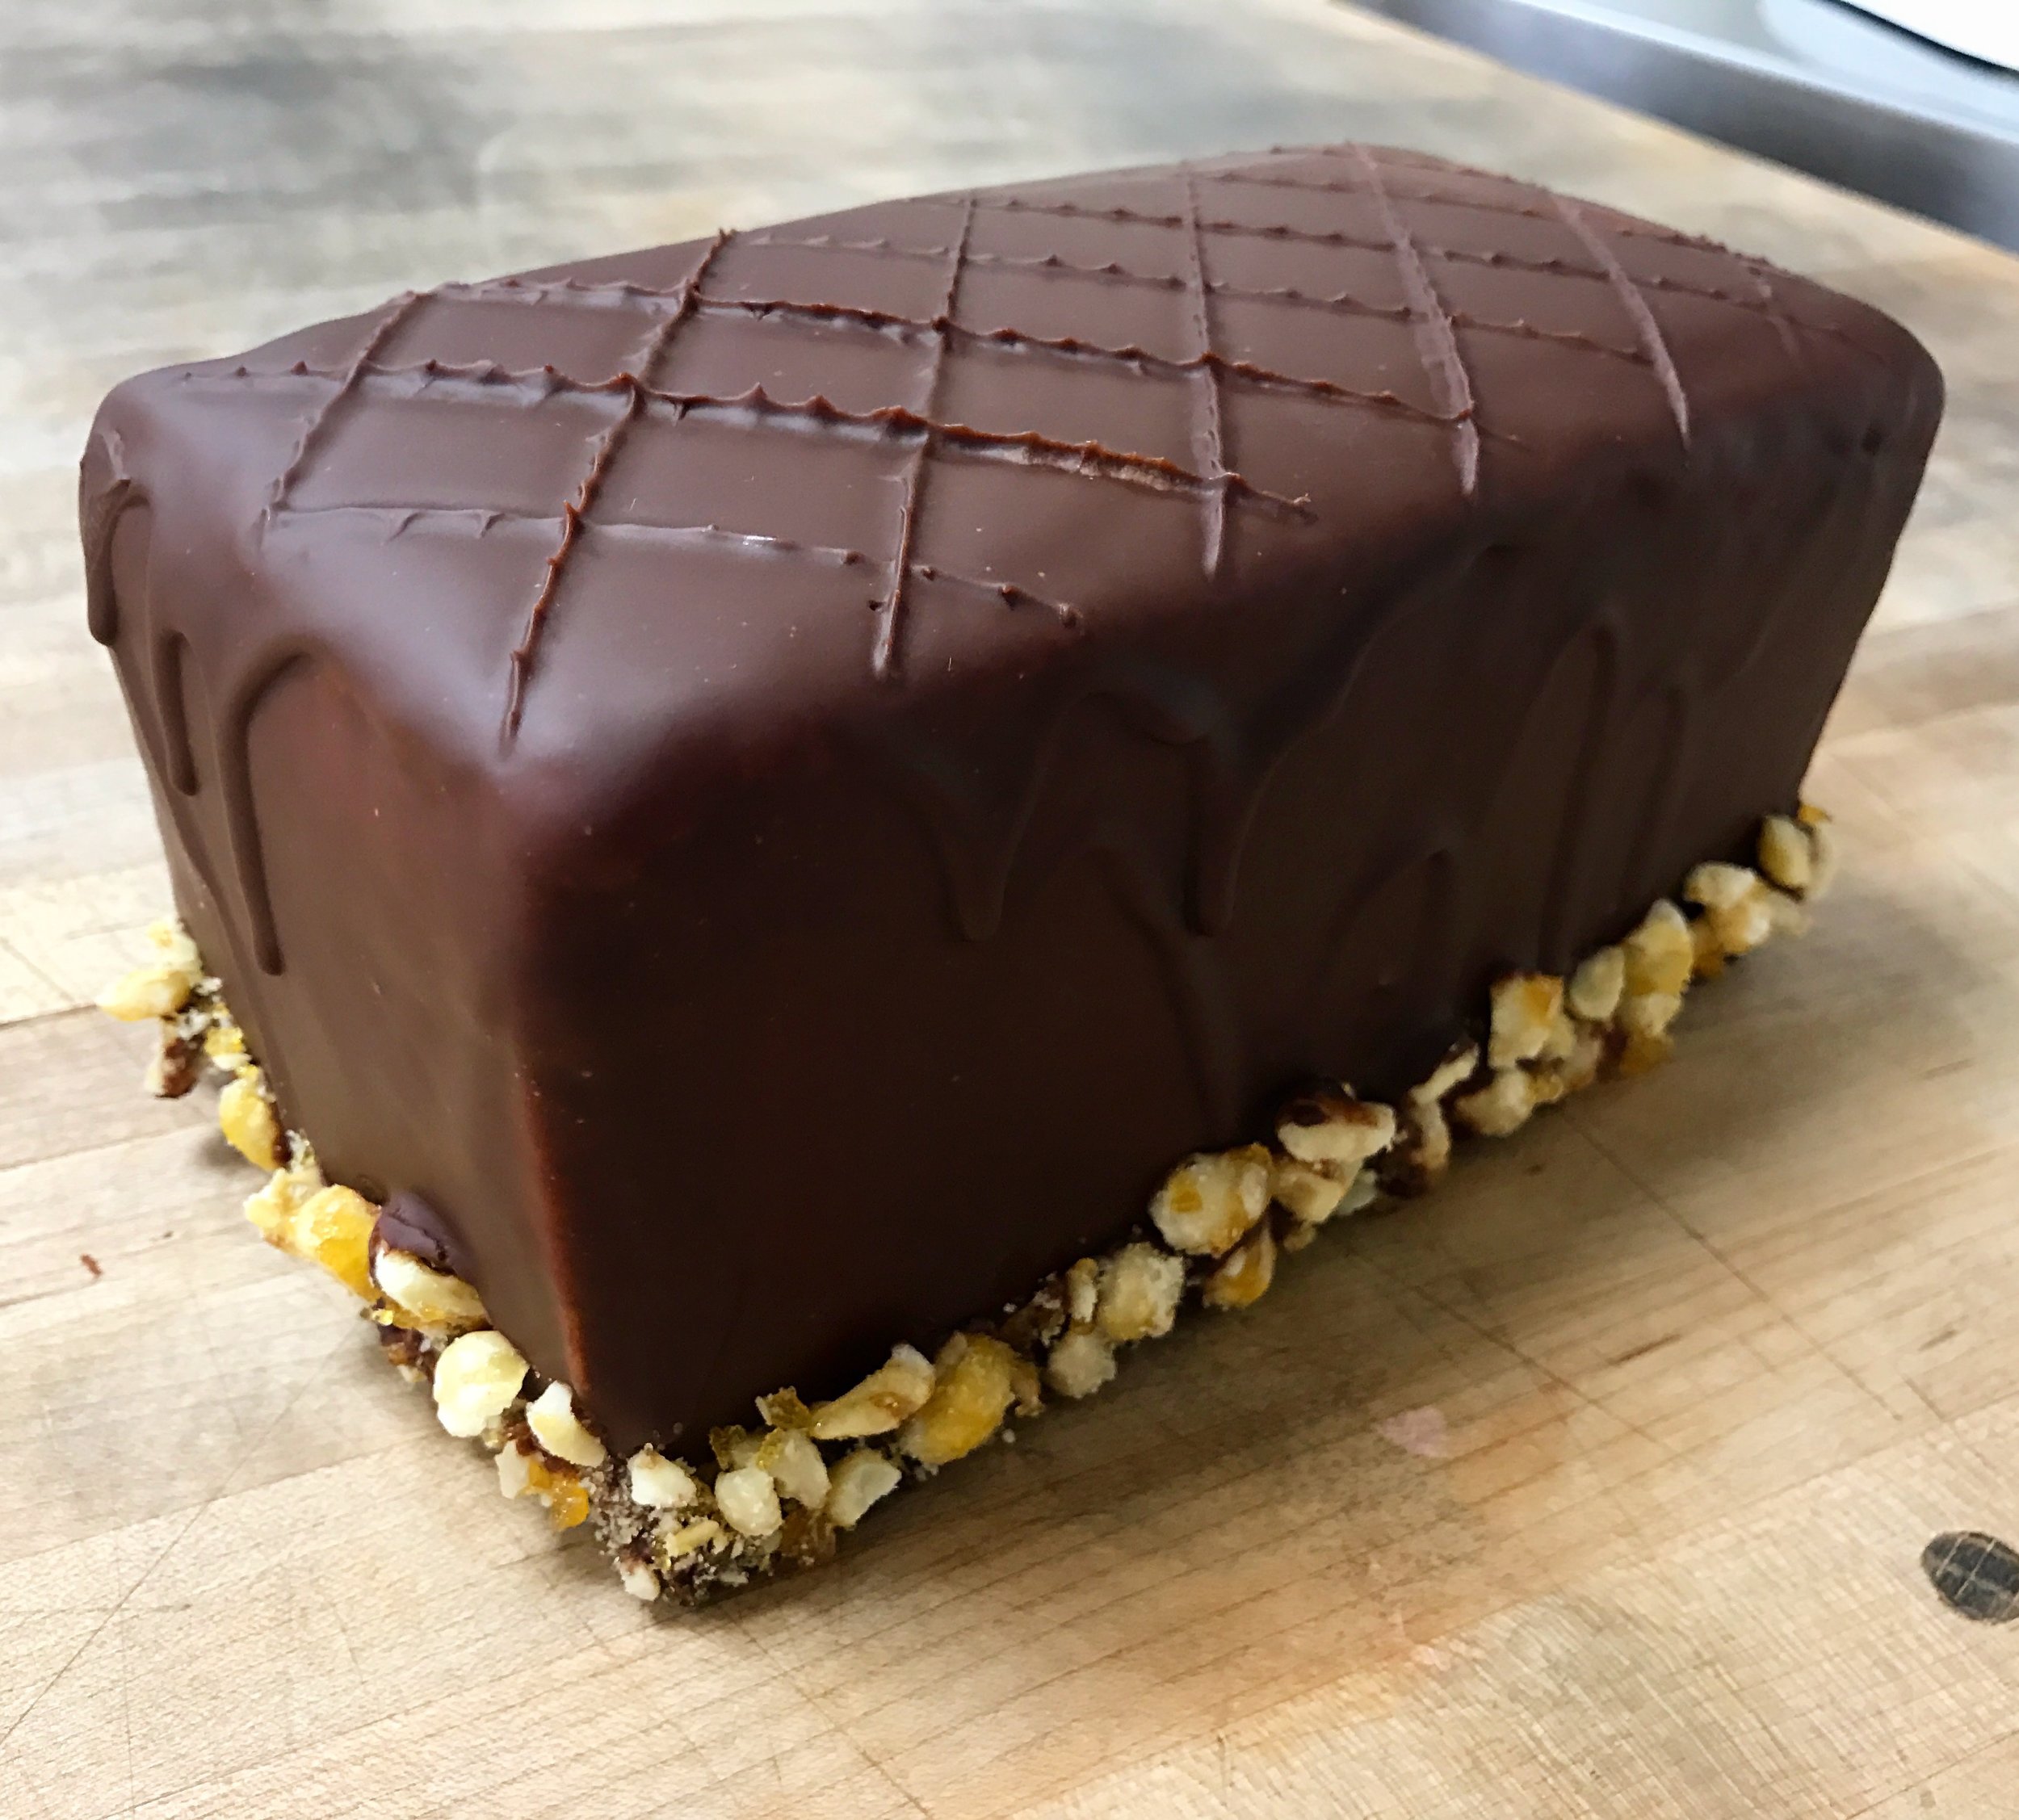
Fully assembled marjolaine
After those guys were both glazed, the chocolate ganache cake got cocoa nibs around the outside edge of the cake, whereas the marjolaine got some crushed candied hazelnuts. Then, we stuck the candied rose petals from Monday on top of the chocolate ganache cake, and did a nice little quilted pattern in the chocolate on the marjolaine. The last thing that we had to do on Wednesday was assemble our lemon chiffon cakes and do a bit of piping practice using different techniques.
We had baked the lemon chiffon cakes last Friday and just stored them in the freezer until Wednesday. We made a quick batch of lemon curd, which would serve as the filling for our lemon cake. Since we had so much leftover frosting from that giant batch last week, we were just able to use that to frost the cake. Much like the genoise, this cake was cut into 3 layers, soaked, and then stacked. For me, it was a little too lemon-y, but again, I'm not huge on the whole lemon thing.
For piping, we got to practice the basket weave, shells, and one of my personal favorite things, cornelli lace. This is that design on the top that sort of looks like a brain. I don't know why I like it so much, but I do. It's just on continuous line that is sort of random and never touches. It looks really pretty in white against a white cake. It's subtle, but so pretty. Just a side note, I remember making cupcakes years ago for halloween, and I used cornelli lace on the top of the cupcakes in red icing to try to get them to look like a brain. This was one of the first piping techniques that I ever really got into when I first started baking and decorating and whatnot. Pretty cool, I think.

Lemon chiffon cake with different piping techniques
After finishing that lemon cake, that was a wrap for Wednesday. The only thing left at the end of the week was a test. Fortunately, it's just the end of a unit, so it's just a short quiz and a practical. And so came Friday: test day. The tests always stress me out, and this one did in particular. It wasn't so much the written portion that I was concerned about, but moreso the baking part. Our genoise had to be split into 3 layers, and the cake that I made in class, I was only able to get two. I made the cake again at home, and was able to get 3 layers no problem, but Chef Jeanne did say that this is a very finicky cake, and it's not necessarily the same every time you do it, even if everything is done identically. I think this is what worried me the most. The only other thing that we had to present alongside the fully assembled and decorated cake was a marzipan plaque with "Happy Birthday!" written out on it in chocolate.

My final cakes 1 test presentation
It was a pretty stressful evening, but when everything came to a close, I was done earlier than anticipated. I was worried that my cake wasn't going to be very good, but come grading time, I only received a few minor notes, which definitely made me feel better.
As of the end of this unit, I am officially 1/3 of the way through the program. Totally crazy!! From here, we go into breads, which is something that I've been looking forward to ever since I started this program. Which you'll all get to hear about soon!
Stay tuned for my next blog, and if you want more frequent updates, you can check out my Instagram.
Thanks for reading!