So I'm A Little Behind

Hey guys. As the title says, and it's something that I'm very aware of, I'm a tad far behind on my blogging. I've been really busy lately and haven't had a chance to play catch up. However! I'm on a break from school next week, so I'm going to do my best to get everything up to speed, so going into the second half of my schooling (side note: that's insane, that I'm almost half way done!) we'll be all hunky dory!  

Thank you for your patience, and you'll be back to reading about my culinary adventures very soon. 

Merry Christmas & Happy Holidays! 🎄

Cake Me Away

Okay, moving forward onto the next blog. Playing catch up is pretty difficult, I must say. I've been so busy lately, it's hard to find time to sit down and write, but I have a few hours this morning, so my goal is to have you guys all caught up by the end of today. So, here we are at week 2 of cakes 1! This is the last week of cakes, at least for right now. The cake unit gets split into two, like I said in my last post. One more focused on baking and structure, while the other cake unit is more decorative. By the end of this week, I'll have brought 5 cakes home. That's an average of 1.67 cakes per day! Which, by the way, is an absurd amount of cake for 4 people to eat. But enough of my rambling, let's get going through what I did this week!

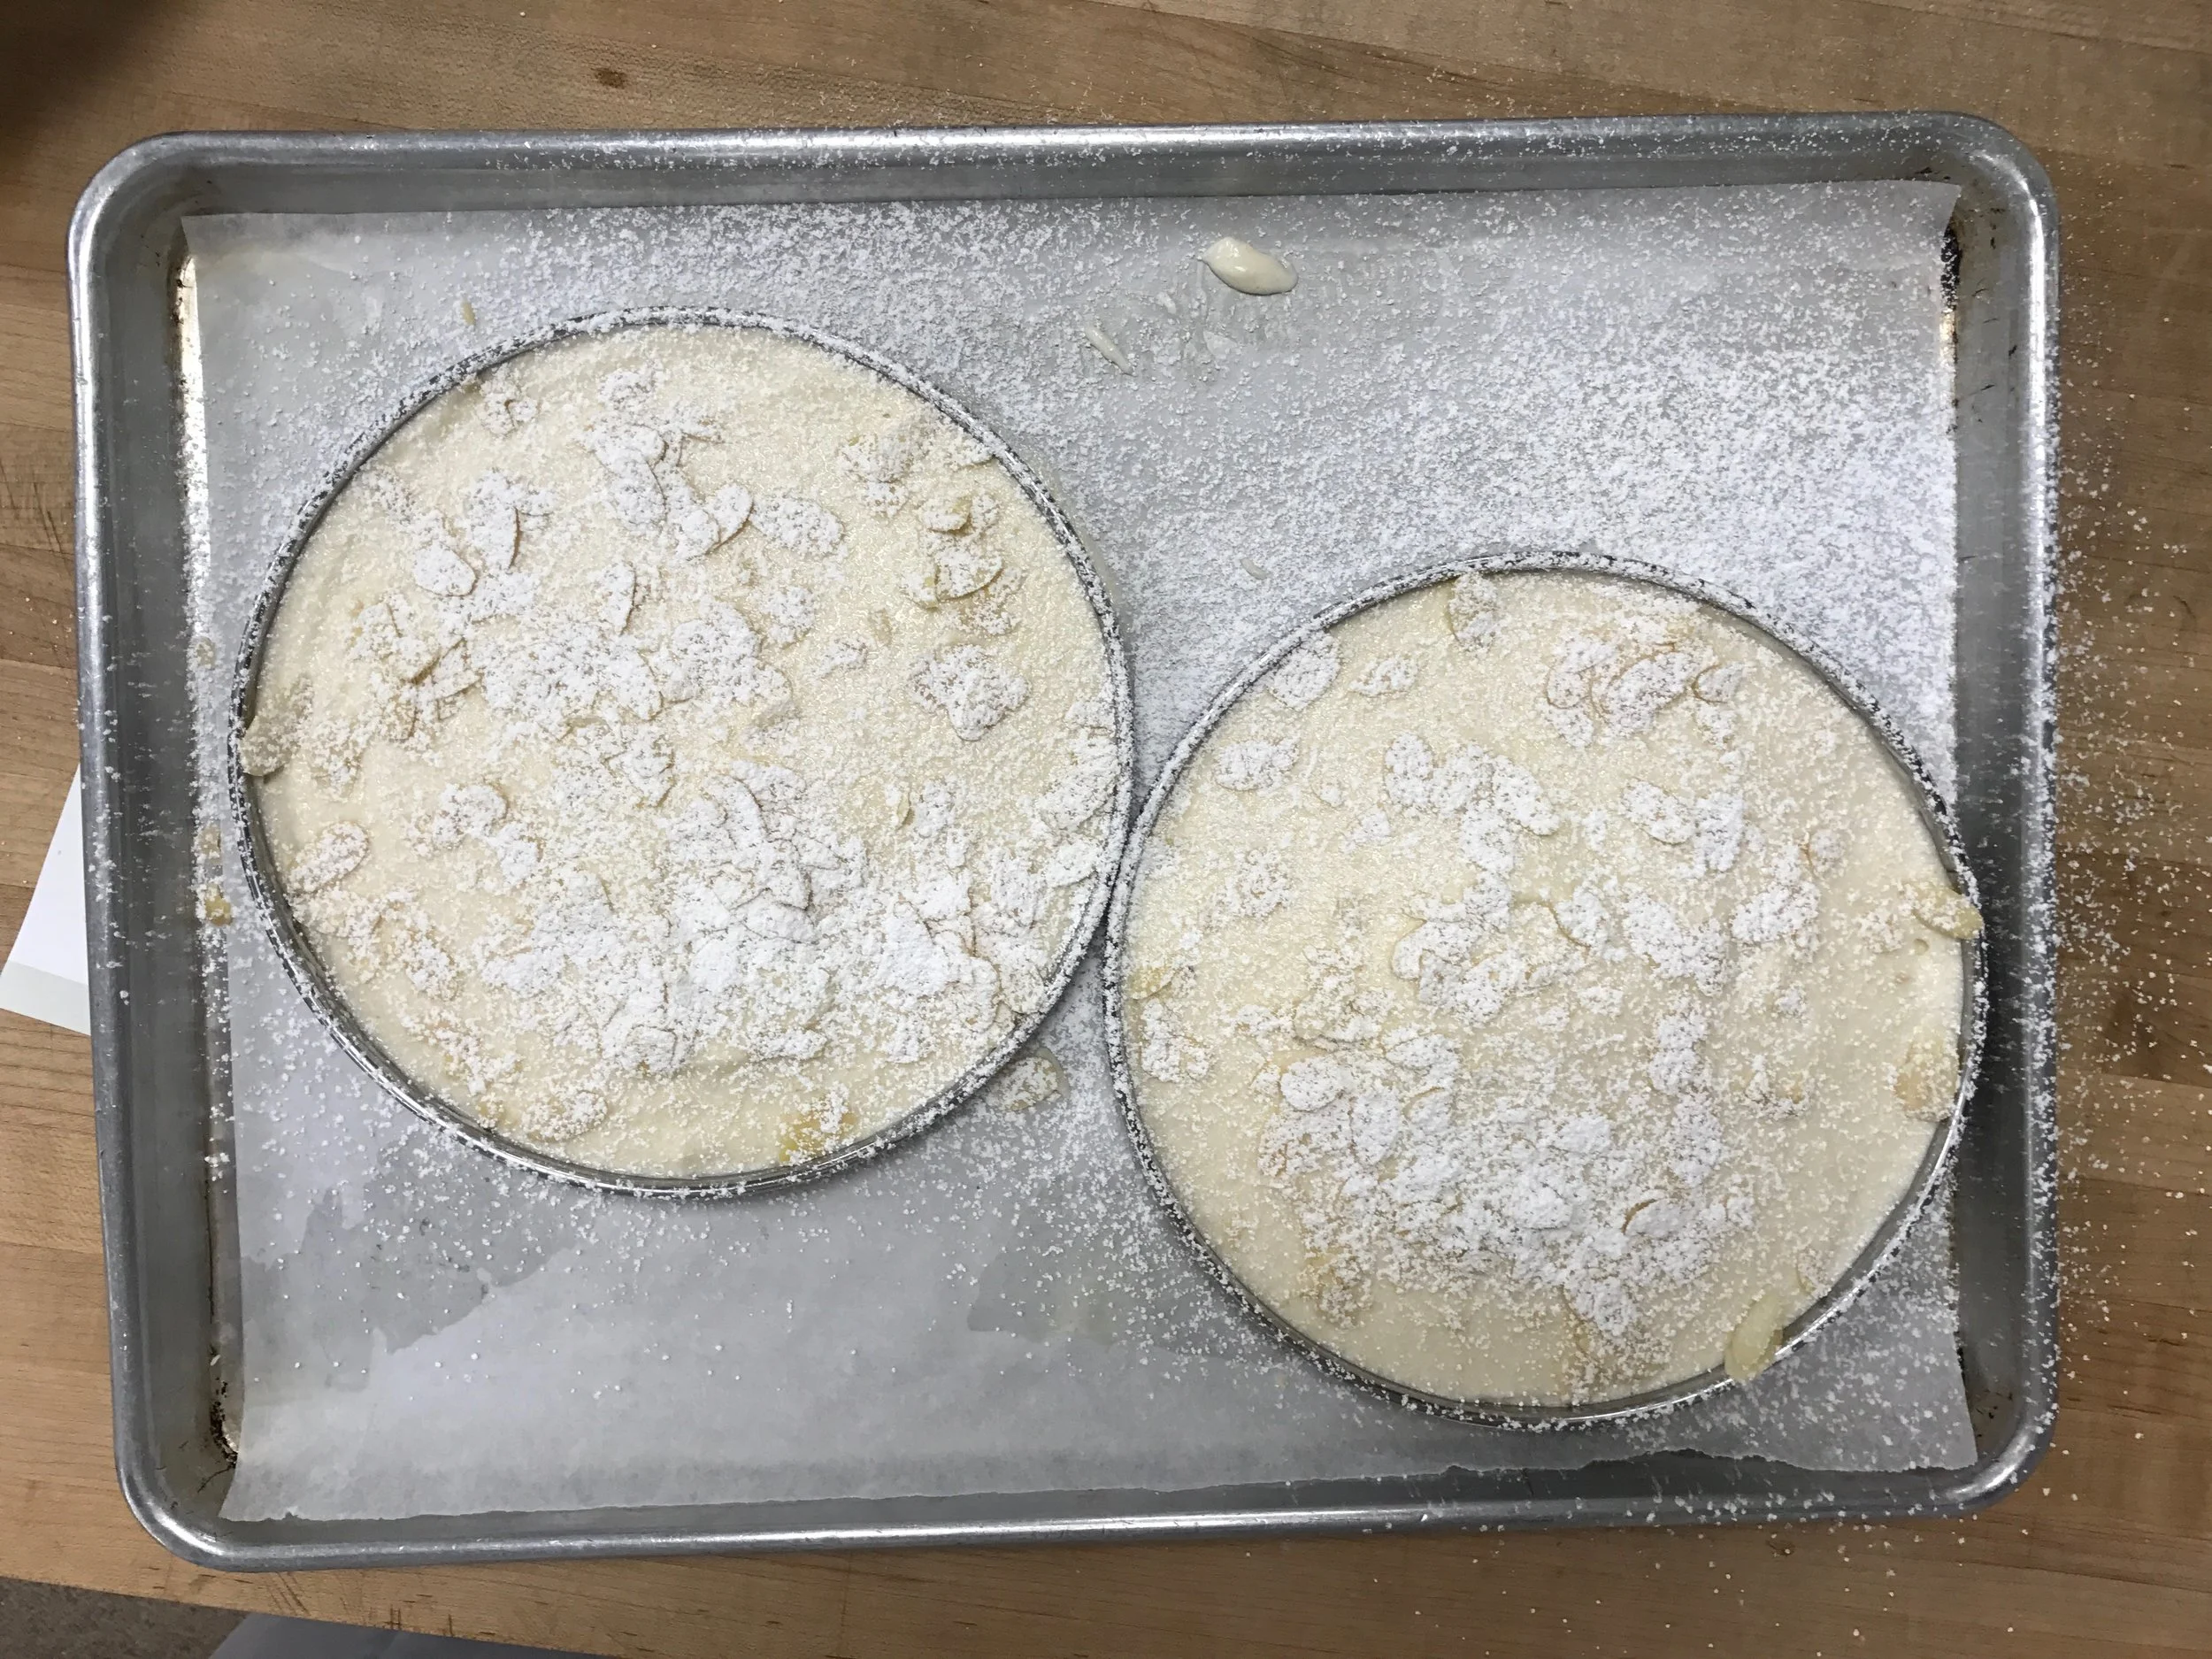
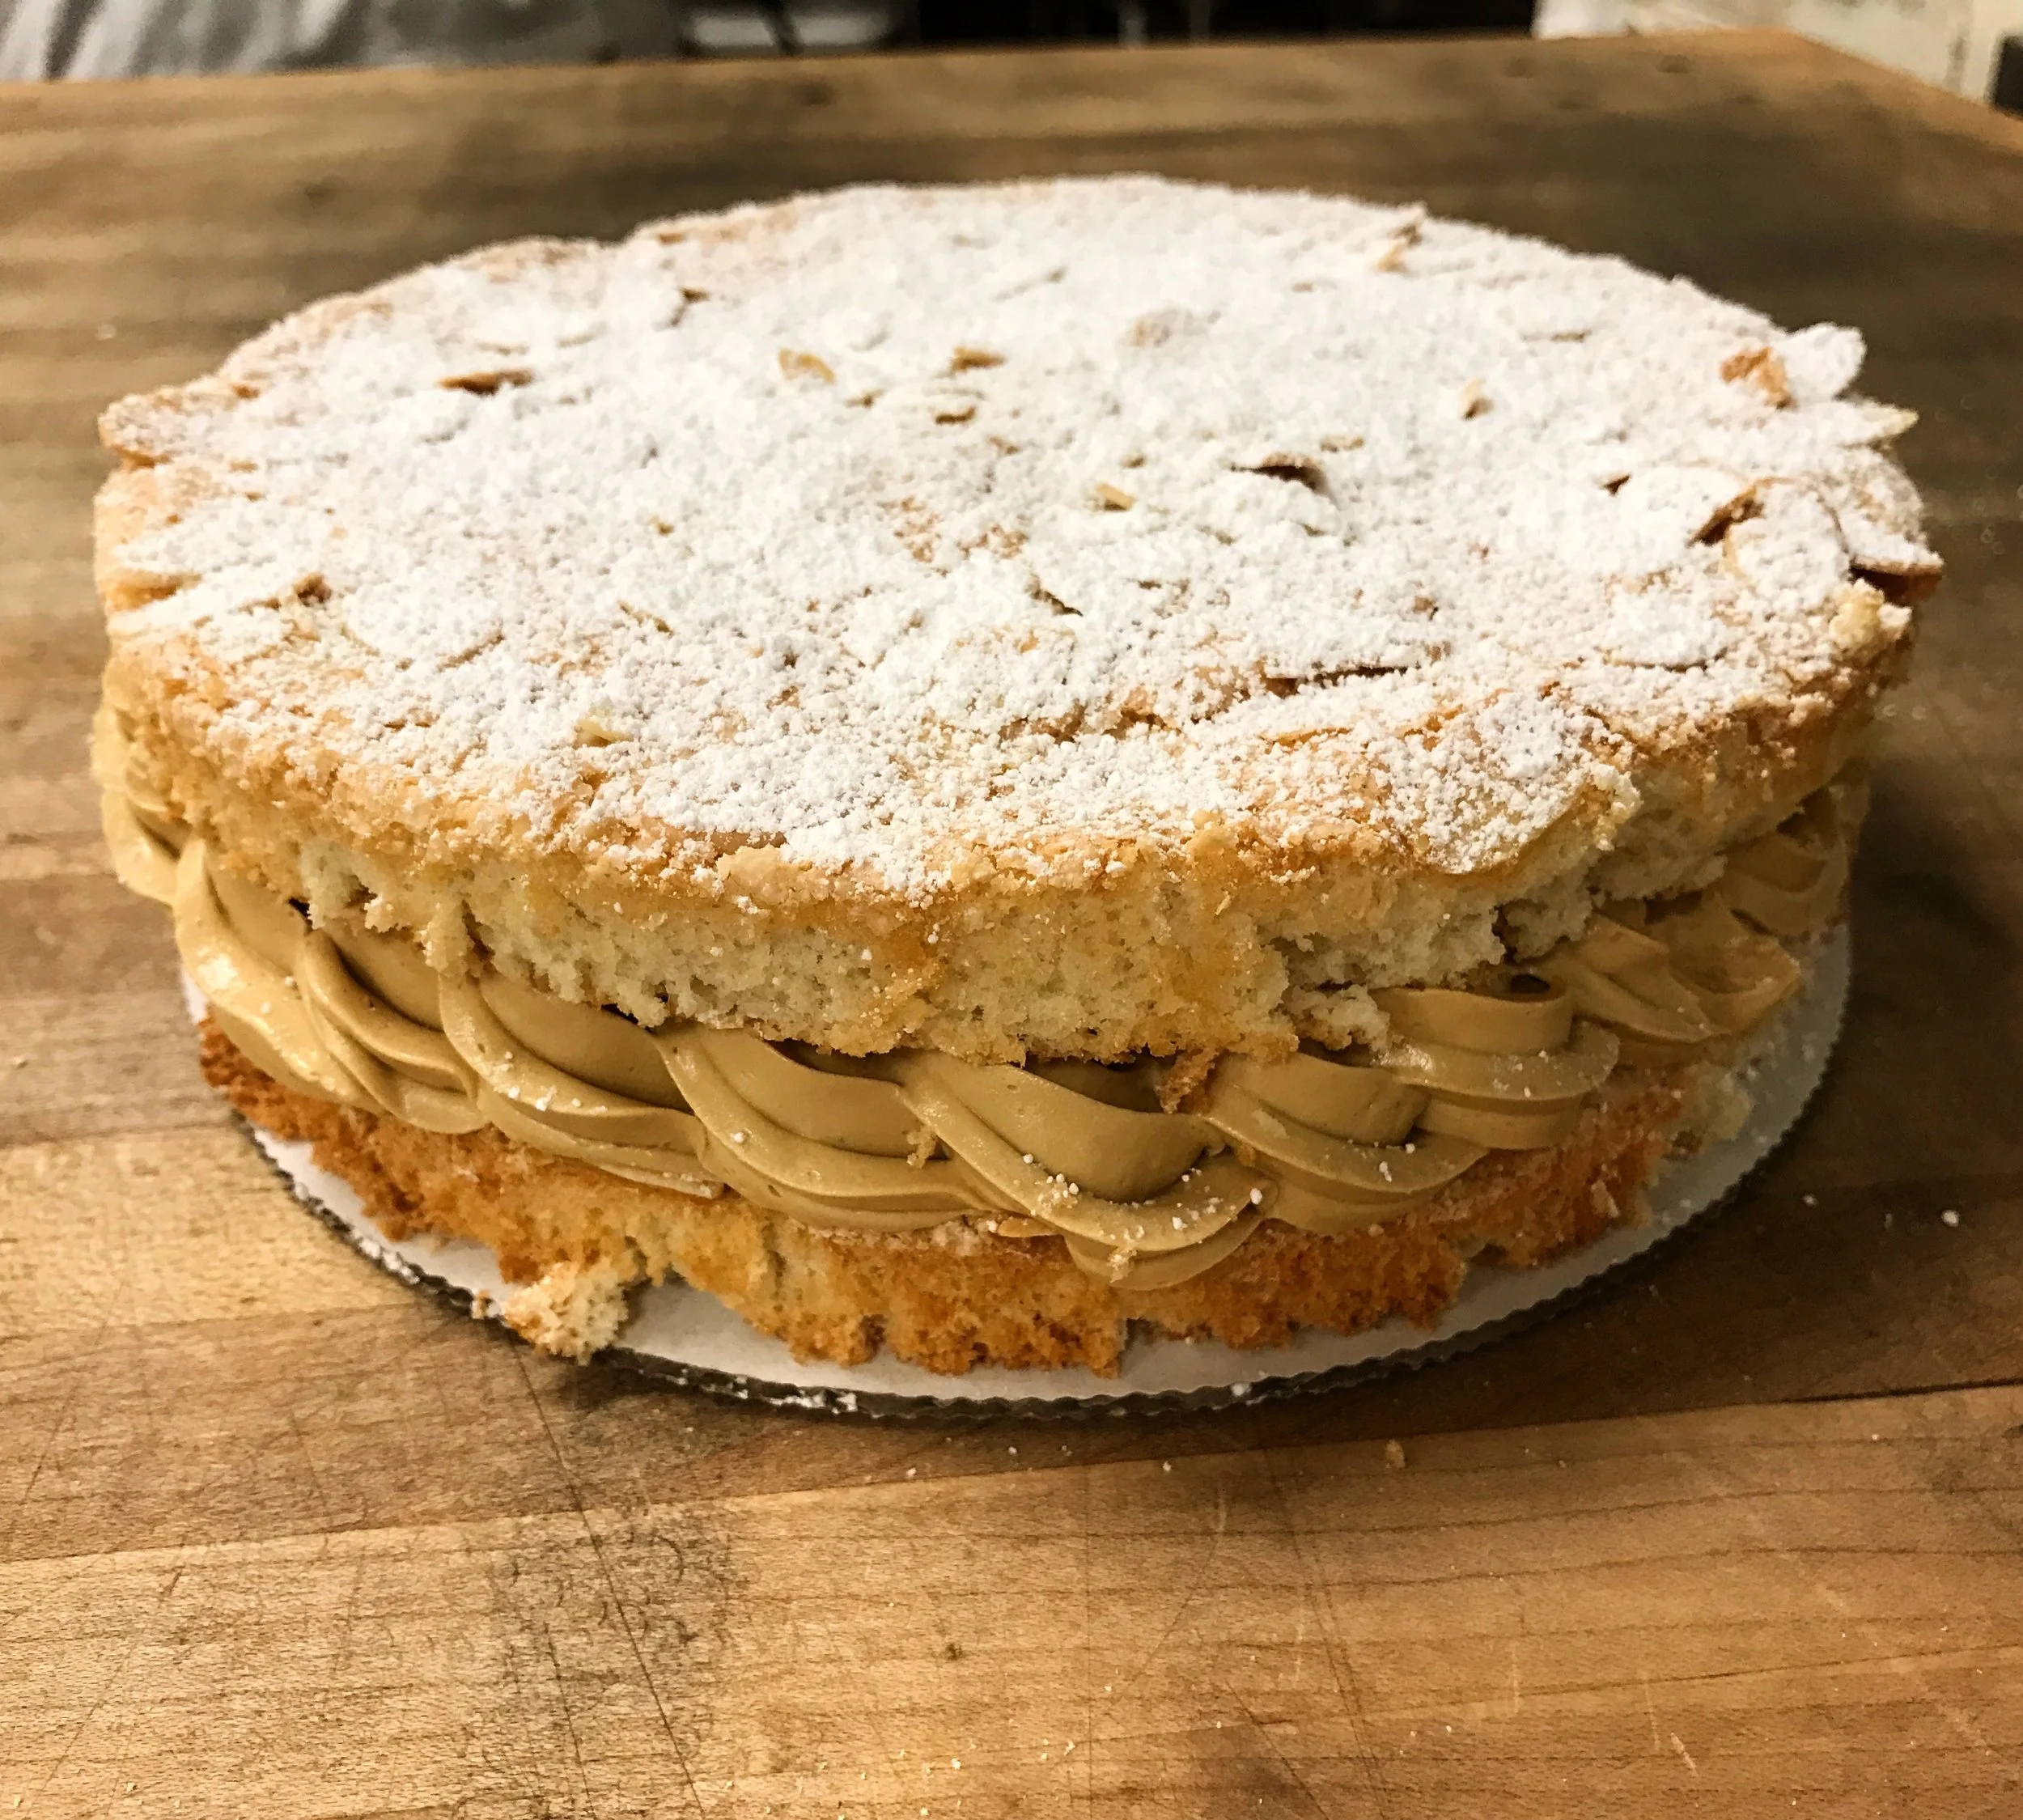
On Monday, the first thing that we got working on was the marjolaine. Last week when we made the bigger, rectangular sheets of meringue, this is what those guys were for. The marjolaine is a super complex, layered cake, with so many delicious fillings. I had never had anything quite like it! The nine layers go like this: chocolate genoise, chocolate ganache, meringue, creme d'or (which is like chocolate whipped cream), meringue, praline buttercream, meringue, stabilized whipped cream, meringue. Phew! Then that entire thing is set to hang out in the fridge until Wednesday so that the fillings set up nicely. There's still a lot to do to tackle this cake, but trust me, it'll be worth it when it's done! 

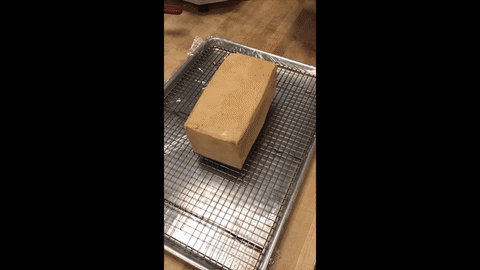
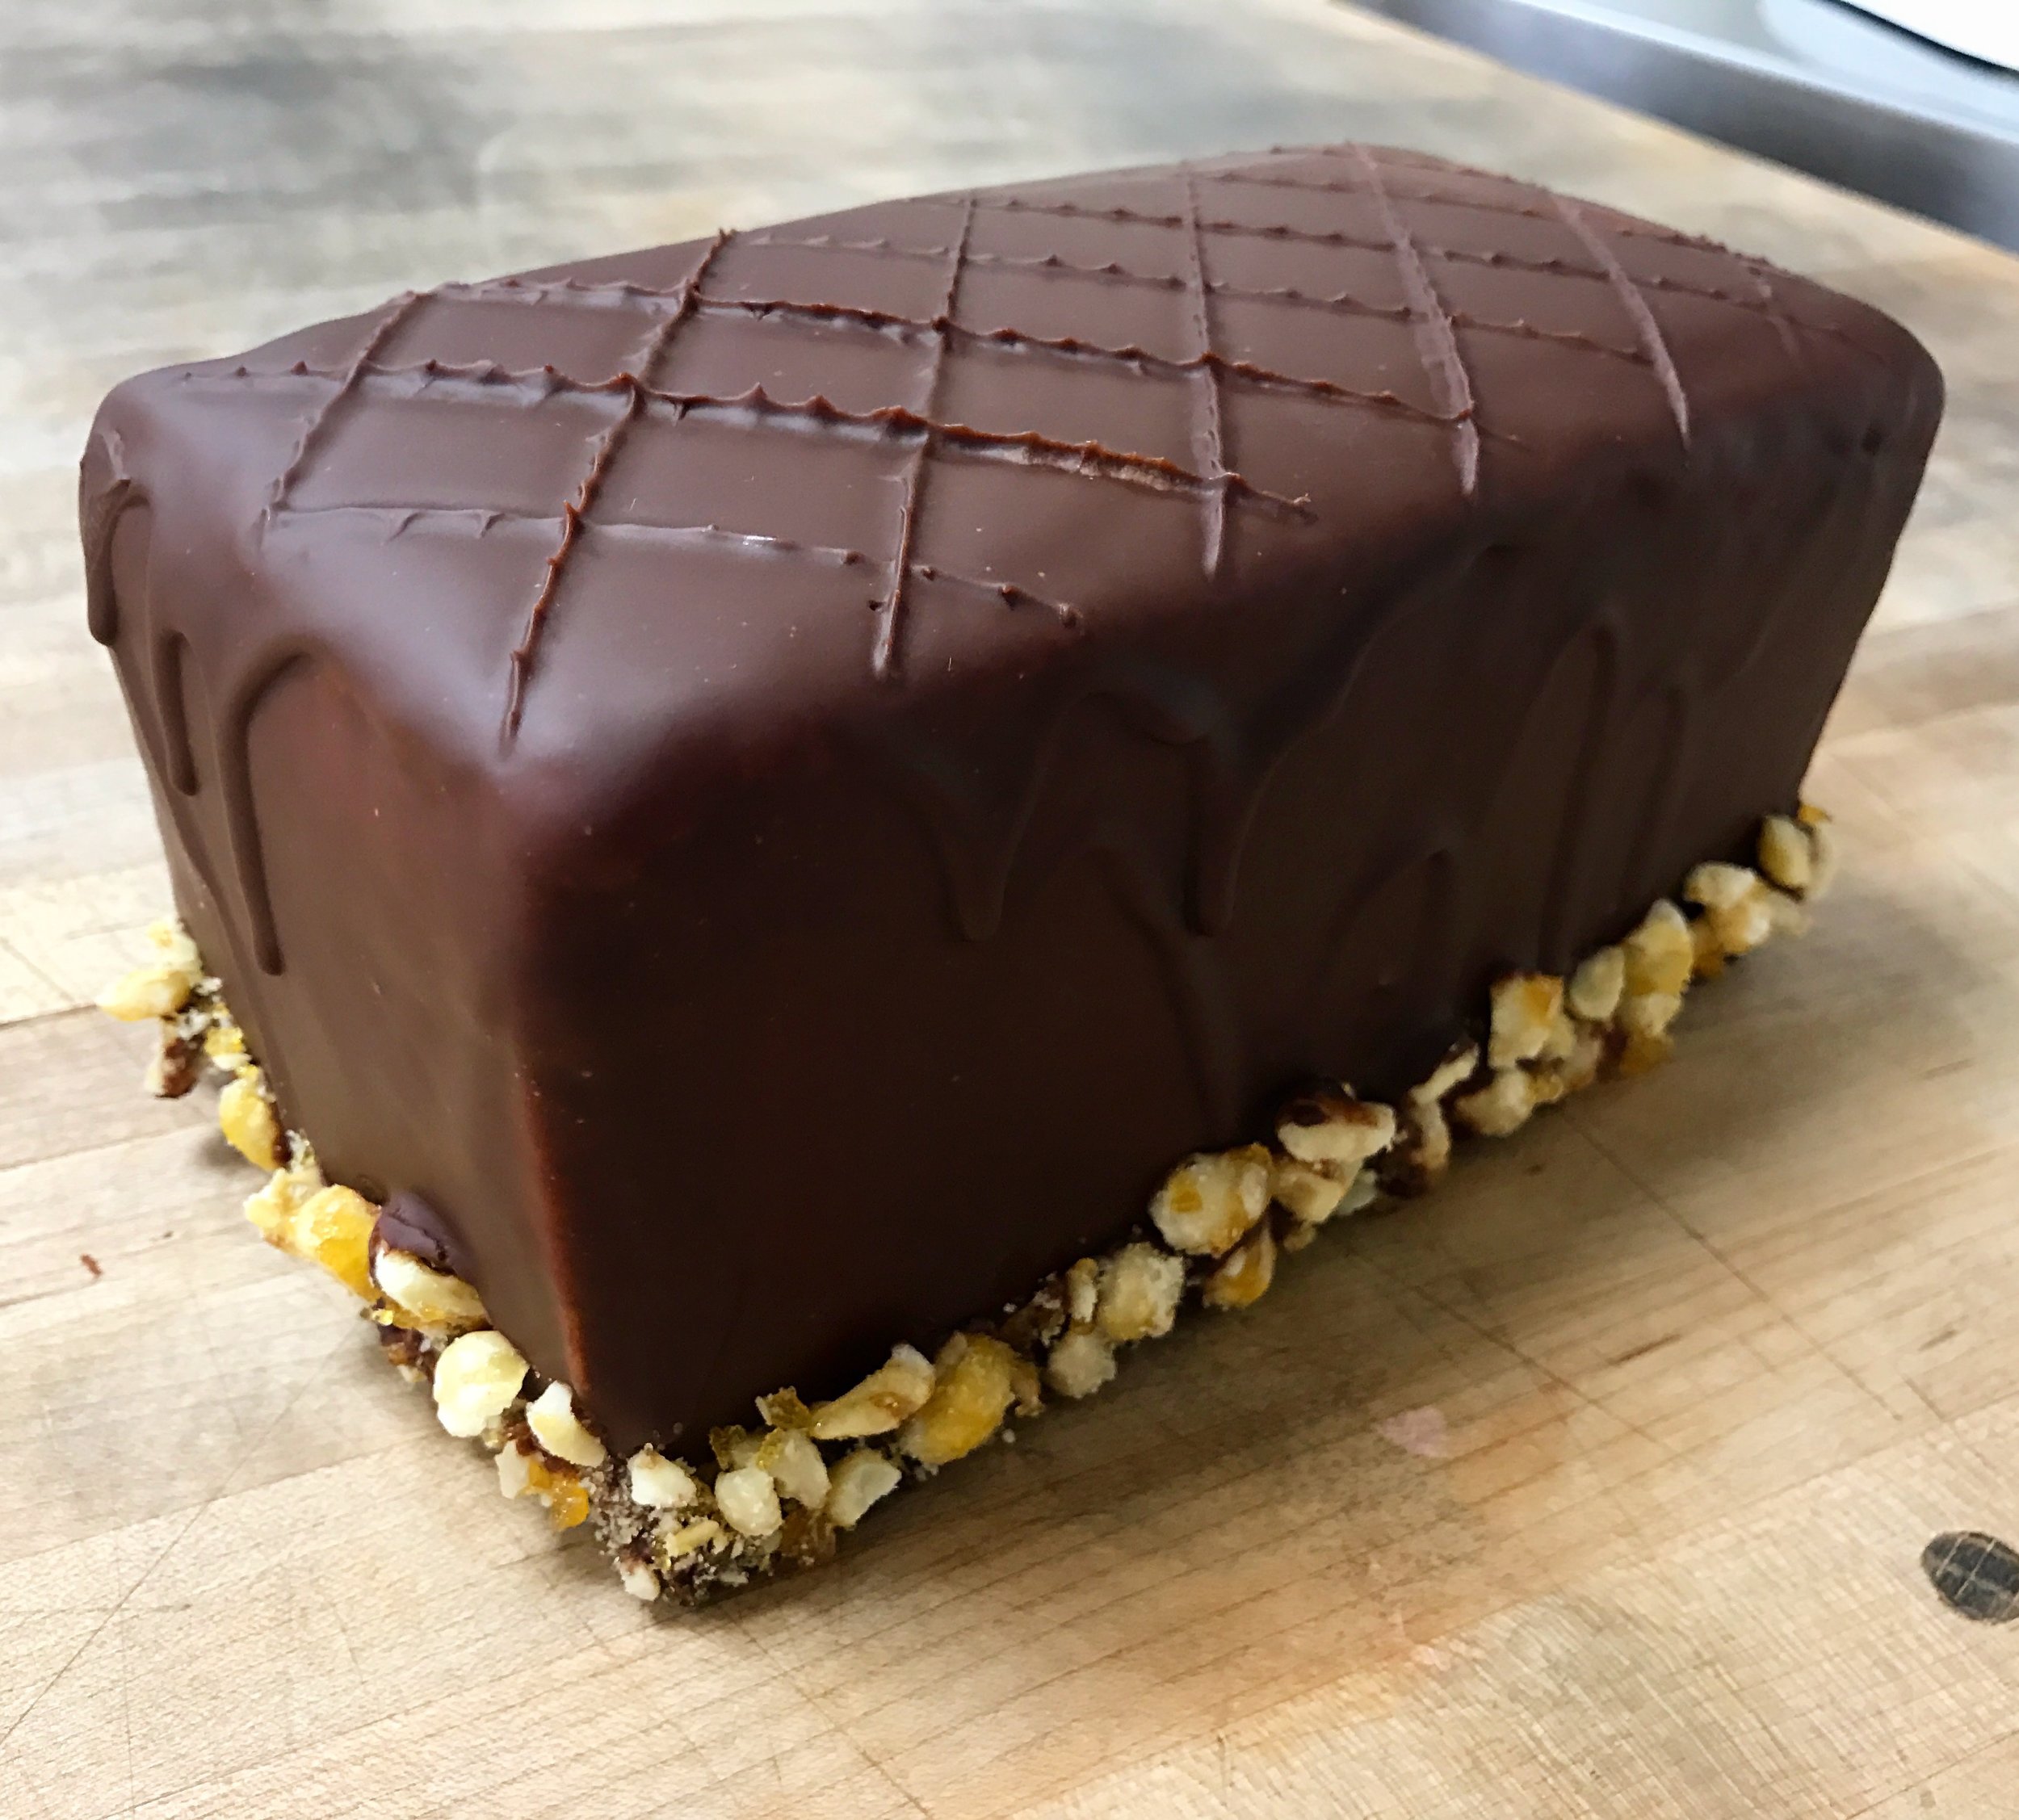
From there, we got working on a flourless chocolate cake. I, for one, really enjoy flourless chocolate cake. It's nice and moist, dense, and delicious! I also really like chocolate lava flow cake, but that's another story entirely. This wasn't the only chocolate cake that we worked on on Monday night. We also put to use the rest of that sheet pan of chocolate genoise that we made last week. In addition to the rectangle that we cut out for the marjolaine, we cut out 3 circles for a chocolate ganache cake. This cake was pretty interesting because we built it inside of a cake ring. First we lined the ring with whipped chocolate ganache, then started to stack the cake inside of that ring. This way, once the cake was 100% set (we let it sit in the fridge until Wednesday, just like the marjolaine), we could slide the ring off, and we'd have a perfectly smooth cake exterior. 

This chocolate ganache cake was just alternating layers of chocolate genoise and whipped chocolate ganache. If you didn't think that was enough chocolate, just wait until it gets finished on Wednesday; you'll be in for a real treat! 

Candied rose petals, anyone?

Candied rose petals, anyone?

By this time, our flourless chocolate cake was out of the oven. While it was cooling, we got to candy some rose petals that would go on top of the chocolate ganache cake! Just a side note, roses are my absolute favorite flower, as cliche as it is. I was super excited about this because not only are rose petals really pretty and smell amazing, we got to take home the extra roses from class that we didn't candy. In order to candy the rose petals, all that we did was take the individual petals, brush the very lightly in egg white, and then tossed them in sugar. We let these guys sit in dry storage until Wednesday night (which if you can't tell, sitting until Wednesday night is a theme here). 

Once our flourless chocolate cake had cooled and we had prepared our creme d'or, it was time for assembly. We cut all of those meringue logs that we made last week into shorter segments. It was sort of random and a matter of personal preference. Once the cake was iced, we stuck the logs all around the side, and then piled a bunch of them on top. That's a wrap on Monday!

Flourless chocolate cake... MMMM

Flourless chocolate cake... MMMM

Marjolaine cross section

Marjolaine cross section

On Wednesday, I took home 3 cakes: the marjolaine, a lemon chiffon, and a whipped chocolate ganache cake. All of which we started on Monday (I told you that there was a theme going on here). The first thing that we got started on was the marjolaine. Since this guy had been chilling in the fridge since Monday night, it was nice and firm. We had to trim the cake down so that the filling would be even all the way around. Everybody had a little bowl of cake scraps from trimming the cake. It was quite delicious, we all had a few nibbles ;) Once the marjolaine was trimmed, we had to crumb coat the entire thing with more of that praline buttercream. The goal was to get it as smooth as possible, since this cake, just like the whipped chocolate ganache cake, would get a nice layer of chocolate poured over the top as the outer-most icing. 

While the crumb coat on the marjolaine was firming up in the fridge, it was time to unmold the chocolate ganache cake. Since the cake was adhered to the cake ring, we had to heat it up with a kitchen torch. This was a really delicate process because heating it too much would cause all the ganache to melt, but not heating it enough would cause the cake to break when pulling the ring off. Fortunately, no one had a melting cake incident, and all of the cake rings came off just fine. 

Glazing the marjolaine

Glazing the marjolaine

Once the cake was out of the ring, we had the marjolaine and the ganache cake lined up, since those were both getting glazed with the same chocolate over the top. It was a little nerve racking to glaze them, to be honest. You didn't have much time to get all of the chocolate on there before it started to harden. Even worse, was that when you had to remove the excess chocolate off of the top, you had one shot at swiping the chocolate away before it solidified. Pretty scary, but I was able to get it done. 

Fully assembled whipping ganache cake

Fully assembled whipping ganache cake

Fully assembled marjolaine

Fully assembled marjolaine

After those guys were both glazed, the chocolate ganache cake got cocoa nibs around the outside edge of the cake, whereas the marjolaine got some crushed candied hazelnuts. Then, we stuck the candied rose petals from Monday on top of the chocolate ganache cake, and did a nice little quilted pattern in the chocolate on the marjolaine. The last thing that we had to do on Wednesday was assemble our lemon chiffon cakes and do a bit of piping practice using different techniques. 

We had baked the lemon chiffon cakes last Friday and just stored them in the freezer until Wednesday. We made a quick batch of lemon curd, which would serve as the filling for our lemon cake. Since we had so much leftover frosting from that giant batch last week, we were just able to use that to frost the cake. Much like the genoise, this cake was cut into 3 layers, soaked, and then stacked. For me, it was a little too lemon-y, but again, I'm not huge on the whole lemon thing. 

For piping, we got to practice the basket weave, shells, and one of my personal favorite things, cornelli lace. This is that design on the top that sort of looks like a brain. I don't know why I like it so much, but I do. It's just on continuous line that is sort of random and never touches. It looks really pretty in white against a white cake. It's subtle, but so pretty. Just a side note, I remember making cupcakes years ago for halloween, and I used cornelli lace on the top of the cupcakes in red icing to try to get them to look like a brain. This was one of the first piping techniques that I ever really got into when I first started baking and decorating and whatnot. Pretty cool, I think. 

Lemon chiffon cake with different piping techniques

Lemon chiffon cake with different piping techniques

After finishing that lemon cake, that was a wrap for Wednesday. The only thing left at the end of the week was a test. Fortunately, it's just the end of a unit, so it's just a short quiz and a practical. And so came Friday: test day. The tests always stress me out, and this one did in particular. It wasn't so much the written portion that I was concerned about, but moreso the baking part. Our genoise had to be split into 3 layers, and the cake that I made in class, I was only able to get two. I made the cake again at home, and was able to get 3 layers no problem, but Chef Jeanne did say that this is a very finicky cake, and it's not necessarily the same every time you do it, even if everything is done identically. I think this is what worried me the most. The only other thing that we had to present alongside the fully assembled and decorated cake was a marzipan plaque with "Happy Birthday!" written out on it in chocolate. 

My final cakes 1 test presentation

My final cakes 1 test presentation

It was a pretty stressful evening, but when everything came to a close, I was done earlier than anticipated. I was worried that my cake wasn't going to be very good, but come grading time, I only received a few minor notes, which definitely made me feel better. 

As of the end of this unit, I am officially 1/3 of the way through the program. Totally crazy!! From here, we go into breads, which is something that I've been looking forward to ever since I started this program. Which you'll all get to hear about soon! 

Stay tuned for my next blog, and if you want more frequent updates, you can check out my Instagram.

Thanks for reading!


Cakes 1 to Know One

I'm slowly getting back on track with blogging at the end of the week (woo!), and as I said before, I'm going to try my best to keep it that way. After the puff pastry unit came to a close, now we're moving into cakes, which is super exciting. At ICC, there are two cake units, the first of which I started two weeks ago. The first unit focuses more on basic things like construction, crumb, frosting, etc., whereas the second cakes unit focuses more on decorations and the creative aspects of cakes. 

Lemon pound cake with a lemon glaze. It's a lemon wonderland!

Lemon pound cake with a lemon glaze. It's a lemon wonderland!

Marble cake, one of my personal favorites

Marble cake, one of my personal favorites

We started off with pound cake and cupcakes, two of the most basic cake things. I always thought that pound cake was named as such because there was a pound of butter in it. Turns out, there's a pound of quite a few things in there (butter included!), but also sugar and flour. We made two types of pound cake that night, lemon and chocolate marble. I'm not usually a fan of lemon cake, but I've gotta say, this one was pretty delicious! Of the two, though, the chocolate marble was definitely my favorite. The chocolate marble cake was a high ratio cake, which meant that it had a very high ratio of sugar, when comapred to the other ingredients. It had a really nice, fine texture. I could've eaten that cake for days. 

Mmmm... chocolate cupcakes!

Mmmm... chocolate cupcakes!

The other thing that we made that day was chocolate cupcakes with a chocolate frosting / glaze thing. These were also really tasty. I love a good cupcake, but I'm not too big on frosting, so these were perfect for me. They just had a nice thin layer of the chocolate glaze over the top, so the frosting was there, but it wasn't too overpowering. 

On Wednesday, we made to types of Genoise cakes: one vanilla and one chocolate. These cakes are super finicky because they're basically held up with air. The cake only has 5 ingredients, and it starts by mixing an egg, sugar, and salt over heat, then once it hits a certain temperature, you beat it in a mixer until it's cooled down, and tripled in size. From there, you fold in sifted flour as gently as possible. Once that's all combined, you take a tiny bit of the batter, and "sacrifice" it - mixing it in with the butter, without any of the care we had with the folding. Then mix that little bit of sacrificial batter back in with the other batter, by gently folding it in. Then it's into the prepared pan and baked immediately. This is definitely not one of those cakes that you can let rest on the counter, because the longer it sits, the more it will deflate. The key with this cake is that it's tall enough to slice into 3 even layers after it's baked, so getting that height is really important. 

Vanilla genoise, cooling upside down

Vanilla genoise, cooling upside down

Prepping for the chocolate genoise

Prepping for the chocolate genoise

We did the same thing with the chocolate variation, except rather than baking it in a cake pan, we baked it into a flat sheet pan, and we would end up cutting out the layers with a cake ring, almost like a giant cookie cutter.  

After the cakes were both baked and we had dinner, we made a big ol' batch of pate a bombe buttercream. Like I said earlier, I'm not a huge frosting fan, but man this stuff is delicious! That is, in small quantities. Since there was so much butter in this frosting, it sort of left that butter feeling in your mouth. You know what I'm talking about? But if you had just a little bit, like dipped in a candied almond – which is how we all sampled it – it was mighty delicious.  

Giant batch of buttercream, egg for scale

Giant batch of buttercream, egg for scale

Completed genoise! 

Completed genoise! 

Once the frosting was made, we cut our cakes into layers, then soaked them with a combination of simple syrup and a liquor of our choice. I went with amaretto, because I thought that it would go great with the apricot jam that went in between each layer. The other option was orange liqueur, and I just thought that amaretto sounded a little bit better to me. Once the cakes were soaked and stacked, it was time to frost and finish them! This was a really lovely cake, and it sort of just absorbed the flavor of whatever you soaked it in. That plus the filling was a great combination. 

On Friday we had a lot of recipes to do, but we only ended up taking one cake home. The rest were for cakes that we were going to assemble next week. We started off making the biscuit dacquoise, which was a meringue based cake, and had a similar feel to something that we did back during the tarts and pies unit. We piped the cake into two rings, and baked those off. While those guys were baking, we got working on our lemon chiffon cakes. Again, I'm not a huge lemon person, but this cake at least smelled pretty good. What I thought was interesting was that this cake needed to be cooled upside down. Normally, we always flip cakes over to cool them, but this was a pretty delicate cake, and we couldn't risk flipping it. But before we could start to cool it off, we had to bake it first. 

Spreading the meringue into the pans

Spreading the meringue into the pans

Chocolate meringue logs

Chocolate meringue logs

After those were in the oven, we made two different kinds of meringues. The first kind we made into 4"x8" sheets, since those were going to be used in our marjolaine next week, and that's about the size of a finished cake. The other merginue was a chocolate variation. We whipped the batter up and piped off some chocolate meringue logs. These were just going to be saved until Monday. They were just for decorating one of our cakes, to go all around the outside. We had to bake all of the meringues for quite some time at a pretty low temperature, since they needed to be nice and dry.  

Once we were back from dinner, it was time to assemble the cake that we made the biscuit dacquoise for. We made a nice coffee flavored buttercream, and piped a nice thick layer around the outside, making sure that it looked pretty. We leaned a new piping technique: the rope. It looks really nice and isn't too difficult. The thing that I had the hardest time with was keeping them nice and tight, so that the frosting would be able to support the weight of the cake on top. Once the pretty border was piped around the outside, we just sort of had to fill up the middle so it was the same height as the edge. From there, we just popped the top layer of cake on and dusted it with a little bit of powdered sugar. Just like that, the week was done!  

Biscuit dacquoise

Biscuit dacquoise

Stay tuned for my next blog, and if you want more frequent updates, you can check out my Instagram.

Thanks for reading!

Puff, Puff, Baby

Okay, let me start off by saying that I know I've been slacking off a little bit with the whole weekly blogging thing. I've been really busy this week and haven't exactly had a minute to sit down and get this taken care of. But, rest assured, I will get back on top of it. I really want to make sure that I stay in the habit of blogging every week. Not only for you guys reading it, but for me too! I think that once I'm out of school, this will be an awesome thing to look back on. 

But anyway, with my excuses for not posting last week out of the way, let me tell you about it! Monday night was a particularly busy night -- heck, I feel like I say that about every night, but I swear, we had a lot to do (moreso than usual), even if it may not seem like it. The very first thing that we did was get our pears poaching for the caged pears. This was something that I was really excited about making for two reasons: one, pears are one of my favorite fruits, and two, when I audited at ICC back in April, this was the night that the other pastry class was in. I think that's kind of cool, that I got to relive that day, but from the other side of the workbench. Little reminiscing for me, that's all. 

Poaching some pears

Poaching some pears

Apple turnovers, just ready to go in the oven!  

Apple turnovers, just ready to go in the oven!  

After the pears were in the poaching liquid, we just let them sit there for awhile. The next thing that we had to do was bake off our apple turnovers that were leftover from Friday. This was a pretty quick process, as all we had to do was egg wash them and then very slightly score the tops, just so they had a nice little design on the top. 

The next thing that we did was quick, which was start our palmiers. We rolled the dough in a TON of sugar, then rolled it up, wrapped it in plastic, and stuck the little log in the fridge for Wednesday. This gives all the sugar time to absorb the moisture in the dough and caramelize a little bit. 

Look at all that sugar in the palmiers

Look at all that sugar in the palmiers

Before we baked the conversations  

Before we baked the conversations  

From there, we went into making our conversations, all the while our pears were still poaching, soaking up all of those delicious flavors. The conversations are sort of like tarts, except they're made with puff pastry instead of tart dough. Then they're filling with almond cream, have more puff on top, then they're topped with royal icing, then baked. Sort of a weird little dessert, but they're not as funky as they sound.  

Conversations

Conversations

Once those were in the oven, our pears got pulled out of the poaching liquid to cool off, and then we got to assembling our caged pears, which was probably my favorite thing of the night. Other than the puff and pear, the only other thing in this was a teeny tiny dollop of almond cream. Like, maybe a tablespoon. We got to use the lattice cutter for the first time, which is a super cool tool. Definitely on my list of things to buy. You have to press pretty hard when you're using it to make sure that the dough is cut all the way through, but then you just pull it apart and like magic, you have a lattice! It's so cool, like I can't get over it. We ran out of time to bake those, though, so those got hotel wrapped and saved for Wednesday. 

Caged pears

Caged pears

On Wednesday, I went home with SO MANY THINGS. I had palmiers, a pineapple dartois, the caged pears, AND a napoleon. Fortunately, two of the things that we were making were already ready to go in the oven, so it wasn't too crazy. After we put our caged pears in the oven, the first thing that we did was get going on the pineapple compote for the dartois. I thought that it was pretty cool that we got to use tropical fruits, just because it's not something that you see too often. Plus, pineapple is legitimately my favorite fruit, so that was super exciting.

Palmiers, all nice and caramel-y

Palmiers, all nice and caramel-y

The pineapple chunks had to cook for a really long time to cook out all of the liquid. They were mixed with bourbon too, which smelled really good. While that was all baking we cut our palmiers from the log we left in the fridge on Monday. 

Wednesday night's baking

Wednesday night's baking

Pineapple, anyone? 

Pineapple, anyone? 

Since our dough was already made, we just cut out the squares that we needed to make the dartois. We got to use the lattice cutter again, which is still so cool. The pineapples got mixed with a cream cheese filling before we assembled the whole thing, so it was a little creamy, a little tropical, all kinds of delicious. We stuck that bad boy in the oven to bake, and then we got going on the most difficult thing of the night, the napoleon. 

For the napoleon, we baked off one giant sheet of puff pastry in sort of a weird way.  We put our big sheet of puff pastry in between two sheet pans and baked it just like that. Since the napoleon needed big, flat sheets, after it was out of the oven we just smushed it down so it was nice and flat and all the layers of dough are all compressed. Once it was out of the oven, we cut it into three pieces while it was still warm, that way we knew we'd get a nice, clean line. 

The Napoleon from Wednesday!  

The Napoleon from Wednesday!  

We went to dinner while everything was cooling off, and when we came back our main focus was assembling the napoleon. We already made our pastry cream earlier in the week so it was pretty quick to get the napoleon assembled. It was alternating layers  of cream and puff, cream and puff. The very top piece of puff was glazed with icing fondant, then as fast as we could - because the icing fondant dries SO quickly - draw lines of chocolate across the top, then using a skewer, make a nice little chevron pattern. Like I said, this stuff dries SO fast, it's insane. My partner and I thought that we were moving pretty quickly, and even still by the time we got to the last few chevrons the icing fondant was already starting to harden. 

The last thing we had to do on Wednesday was make puff for our test that was on Friday. This is something that we sort of worked on throughout the night, and we finished right on time. We drew our lottery for our test (I got the napoleon, palmiers, and vols au vents).   

On Friday, the only thing that we really did was our test. We had a 15 minute quiz, then after that, the kitchen was ours. According to the itinerary that I wrote out, I was planning to be done about 10 minutes before grading was due to start (which was at 9:30pm), but for some reason or another, I was totally finished before dinner. Honestly this was pretty nice, because I had less to worry about. I had one of the more difficult combinations, at least I think. I barely had enough puff pastry to get everything done, which was definitely nerve racking. 

My final presentation for my puff pastry test

My final presentation for my puff pastry test

​Stay tuned for my next blog (which I'm going to go write right now), and if you want more frequent updates, you can check out my Instagram.

Thanks for reading!

Puff! The Magic Pastry 🎶

This was a week full of puff! Puff pastry has always been one of those things that sort of intimidated me for two reasons: one, because it always just felt so complicated, and two, with all of the pretty things that you can make with it, it just doesn't feel like it could be easy.  However, after making puff pastry for a week, I can say that it intimidates me no more! 

Throughout the unit, there are three different kinds of puff that we'd make: quick, classic, and inverse. On Monday night, the very first thing that we did was make our first type of puff pastry, which was quick puff. Of the three, it's the easiest to assemble initially, but I think it's the most annoying to roll out, at least for the first few turns of the dough. When you make quick puff, rather than making a butter block (which I'll get into in a minute), you just cube your butter and mix it all up with the flour, and sort of let it hang out. Then when you roll the dough out, the butter sort of just sheets itself and disperses throughout the dough. 

Quick puff

Quick puff

Quick puff is also the only type of puff pastry dough that has a double turn, which is what that picture is showing. You roll our dough out into a long, skinny rectangle, then fold it toward the center on either end, then fold it in half, like a book.  This is sometimes just referred to as a book turn, conveniently enough.  

As soon as our quick puff was chilling in the fridge, we assembled our classic puff. Of the three, I think that this one tastes the best. This is really just a matter of personal preference, but for me, I love it. In classic puff, there are two separate pieces, the dough block and the butter block. Hard to believe that there's almost a pound of butter - yes, you read that right, a pound - of butter in each recipe. It does make a pretty decent amount of dough, but it's still a lot. Chef Jeanne was saying that some guy did math and worked it out that every croissant has about two tablespoons of butter in it, so it seems less bad when you're looking at that whole pound. Even though two tablespoons of butter is still a TON. But anywho, back to the puff.

Classic puff assembly

Classic puff assembly

Once the butter is incorporated into the dough (you just wrap it up in there like a little present), it's pretty similar to the quick puff when it comes to assembly. The only major difference, assembly-wise, is that this dough gets single turns (or letter turns), rather than double turns. The classic dough ended up with 6 single turns, and the quick puff ended up with 4 double turns, I believe. 

Cheesy straws!

Cheesy straws!

Once all of our dough was ready, we started to bake! The first thing that we made on Monday night were cheese straws. Oh my goodness, so yummy! I mean, who doesn't love cheese? These were sort of similar to the cheese puffs, in that the cheese mixture was the same, but rather than the cheese being mixed into the dough, it was pressed on top. After that, we cut them into long, skinny strips, twisted them. Unfortunately, time got away from us on Monday night, so we had to wrap up our cheese sticks and finish them up on Wednesday. 

On Wednesday, things got pretty complex pretty quickly. The first thing we did was finish off our cheesy straws, then we made almost the same thing, except we used sugar and chopped almonds. These ones were a lot sweeter than the cheese ones (obviously), but I think on the whole came out nicer once they were baked. I, of course, forgot to take a picture of them after they were baked, but for reference, they look a little something like this.

From there, we went on to make our Gateau Pithivier. This was a cake sort of thing that was filled with a mixture of almond cream and pastry cream. I thought that it sort of looked like a giant ravioli, but maybe that's just me. The first thing we did was roll out our dough, obviously, and then we cut out two giant circles. From there, we made a one inch border of egg wash to secure the edges once it was sandwiched together, then went ahead and filled and sealed it, then finally cut it out into one cohesive circle. To get the little scalloped edges, we used a big pastry tip tocut the scallops in, and we used the smallest pastry tip that we had to poke a little steam hole in the top. This was to prevent the puff from basically exploding. The last step was to egg wash and score it before finally putting it in the oven. I was really surprised by how much this thing puffed up from it's original size. I know that puff pastry indicates that it will indeed puff, but up until this point, the only thing that we're really made were the straws, which didn't puff up hardly at all. At least, not compared to this thing. 

Gateau Pithivier

Gateau Pithivier

I think that Friday was the most stressful day this week, not because we had a lot to do, but because of one of the things we were making: tarte tatin. I'd never made tarte tatin before, and fortunately for me at work that morning, we made one in class, but I didn't get to see it through to the end, which involved flipping it upside down to remove it from the pan. That whole part was just a little bit intimidating, especially considering you had to flip it when it was hot, otherwise the caramel would get too sticky and your whole tart would stick to the bottom of the pan, which would be no bueno. 

But, that was an entire night away, so I tucked that thought into the back of my mind and pushed forward. The first thing that we made was the mushroom jalousie. I always love when we get to bake savory things (not that I don't love desserts, I do!), but it's just a nice departure from the regular stuff. We used a combination of brown mushrooms and oyster mushrooms, chopped those up, and mixed them with garlic, chives, parsley, onion, and you guessed it, more cheese. We also added that whole mixture to some bechamel sauce, which is basically just a white sauce with some spices. Once our mushroom mixture was made, we set it aside to cool down, and we got to work on the tarte tatin. 

Tarte tatin in the works!

Tarte tatin in the works!

The first thing that we had to do for that was cook our apples. Minor side note: when you get down to it, tarte tatin really isn't terribly complicated, other than the whole flipping-over-a-hot-pan-with-near-boiling-caramel thing. Really all it is is cooking apples, making caramel, and laying a circle of puff pastry over the top, and sticking it in the oven. The apples took a little bit longer to cook than originally anticipated. We had to make sure that they were cooked relatively evenly on both sides before adding in an absurd amount of sugar to caramelize. As soon as the apples were caramelized, we got to flambé them, which was super exciting. The last time that we flambéed something, I was a little bit afraid to do it, so my partner for that unit took the reigns. This time around, however, I decided that it couldn't be all that difficult so I just went for it. I can't confirm, it really isn't all that difficult. Pour alcohol, ignite with torch, flambé! From here, we just waited for the alcohol to cookoff, laid our circle of puff pastry on top of our fruit, and stuck it in the oven.

Mushroom Jalousie

Mushroom Jalousie

After the tarte tatin was in the oven, the last thing we had left to do was assembled the mushroom jalousie and get that in the oven. Since we had already made our deliciously cheesy mushroom filling, all we had to do was cut our puff into the appropriate sizes, plop the filling in the middle, put the top on, egg wash and bake. On Friday night, we also assembled apple turnovers, but we ran out of time to bake them. So we wrapped them up and put them in the fridge for Monday.  My partner and I were the first ones to pull our tarte tatin out of the oven. I took on the task of flipping it, and boy was it nerve-racking. I guess it really isn't that terrible to flip it over, it's just more cumbersome than anything. Reason being, we had a half sheet tray that we had to balance in the middle with one hand on top while on the underside we had the hot pan with boiling caramel which obviously gets held by the handle, and not the bottom of the pan. I have since made tarte tatin at work, and we flipped them out onto plates (rather than sheet trays), and I can confirm that is 1000% easier.

Tarte tatin, pre and post flip

Tarte tatin, pre and post flip

I have one more week left in the puff pastry unit, then I'll be moving onto cakes! This program is just flying by, and I'm loving every minute of it! 

Stay tuned for my blog next week (or in a few days, really), and if you want more frequent updates, you can check out my Instagram.

Thanks for reading!